How Do I Fix QuickBooks Error 103?

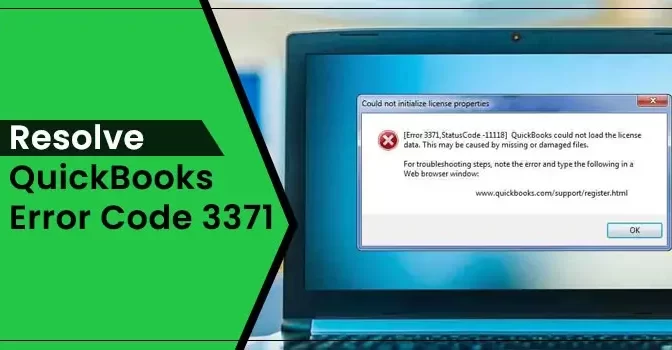
QuickBooks error 103 is a common banking error that arises when the bank server rejects the user’s sign-in request. This error will keep striking until the users update the sign-in details in their QuickBooks account. Updating the login details in your QuickBooks online account will give a signal to the bank server not to block access to your account.

In this article, we will discuss in depth why the QuickBooks error code 103 arises and what solutions you can follow to resolve the error.

“Need instant help to resolve QuickBooks error 103? Speak live with our QuickBooks experts via call at +1 855 706 0905, and get quick help from our QuickBooks experts.”

Also Read:  How to Fix Sage 50 Not Responding

Why Does QuickBooks Error 103 Arise?

Before we directly jump to the solutions to fix QuickBooks error 103, let’s take a look at some of the possible reasons due to why the user may encounter the error;

  • Incorrect login credentials of your online net banking account are the primary reason why the error arises.
  • If you have selected the wrong financial institution.
  • If you have recently updated/ changed the login credentials of your financial institution, but the same still needs to be updated in your QuickBooks online account, it can also lead to QuickBooks error 103.
  • Damaged .msi files can also lead to QuickBooks online error 103.
  • Configuration issues with the QuickBooks files can also lead to QuickBooks error 103.

Also Read: How to Fix QuickBooks Error H101

Solutions to Troubleshoot QuickBooks Error Code 103

Let’s take a look at the different solutions that you can easily follow to keep QuickBooks error 103 at bay;

Solution 1. Verify the Login Credentials

Given below are the steps that you can follow to verify the login credentials of your bank account in QuickBooks;

  • First, you must click on the “Verify Your Credentials” option, which will be displayed on the error message page.
  • Now, your bank’s website with a pop-up window will be open on your screen.
  • Here, you have to provide the login credentials of your bank account. (Note: Don’t enter the login details via the auto-fill option. Instead of that, try providing the login details manually).
  • Now, log out from your bank’s website, and try to return to the QuickBooks account.
  • Through the same format, you have to re-provide the username and password that you provided on your bank website.
  • At last, you have to end this process by clicking on the “Update Sign-in Info” option.If you are still encountering the QuickBooks error 103, try solution 2.

Also Read: How to Change Email on TurboTax

Solution 2. Edit Bank’s Sign-in information in QuickBooks Online
  • Firstly, click on the “Banking” information, which is available on the left side menu screen.
  • Thereon, you must click on the “Pencil” icon that appears above the bank balance.
  • Choose the “Edit Sign-in Info” option, and then tap on the hyperlink, and it will redirect you to the bank’s legitimate website at the top of the window.
  • Now, the financial institution’s official website will be open on your screen.
  • At last, you have to confirm the accounting details related to your account, such as summary, history, summary, and other details, that will help you access your account throughout the website.

Once you have edited the bank’s sign-in information, verify whether the error code 103 QuickBooks has been resolved.

Solution 3. Connect QuickBooks and Bank Account

The next solution is to connect/ link your bank account in QuickBooks. Below listed are the steps that you can execute to do that;

  • Login to your QuickBooks account and select the “Transactions” option.
  • Thereon, you must select the “Banking” option and then click the “Add Account” option.
  • Now, provide your bank’s name in the search bar, and then a new pop-up message stating “New connection with a different login” will appear on your screen.
  • Next, move to the bank’s website and log in to your account with the correct login credentials.
  • Moving ahead, you have to click on the “Connect” option to link your QuickBooks account.
  • Followed by the above steps, you have to end this process, by clicking on the “OK” option.

Also Read: Sage 50 User Name and Password Not Working

Solution 4. Remove the Existing Account

Given below are the steps that you can follow to remove the existing account in your account;

  • At first, you have to log in to your QuickBooks online account.
  • Thereon, click on the “Transaction” option and then select the “Banking” option.
  • Moving ahead, click the “Add Account” option, provide the bank name in the search box, and click the “Search” option.
  • You must click on the bank name as the match results open on your screen.
  • Next, users have to sign in to their account of account which they want to put on the bank’s official website.
  • Thereon, you will be required to associate all of the QuickBooks accounts with the bank accounts.
  • Once you are done with that, you have to click on the “Connect” option, followed by clicking on the “OK” option.

Ending Note

As shown above, we have tried our best to enlist numerous solutions about how to fix QuickBooks error 103. You can easily carry out the steps listed above to troubleshoot the error. If you face any issues while performing the methods or have any other query related to the topic, you can contact our team via phone @ +1 855 706 0905. Our trained QuickBooks experts are available 24*7 around the clock to help you use the accounting software smoothly and efficiently.

Also Read: Remove Form 7202 TurboTax

Frequently Asked Questions (FAQ)

1. Why I am unable to connect my bank account in QuickBooks?

A: If you have already linked a bank account in your QuickBooks account, then it can lead to bank connection issues in your QuickBooks account. Therefore, to deal with this issue, you must ensure that every account is connected to your QuickBooks account.

2. How can I sync my QuickBooks account with the bank’s account?

A: Here are the steps that you can follow to sync your bank account with QuickBooks;

  • Move to the “Banking” menu, and click the “Banking” option.
  • Select the “Add Account” option, and search for your bank name.
  • You can also use the correct URL to log in to your bank’s official website.
  • Moving ahead, provide the bank’s username and login password, and choose the type of account.
  • Choose the date range in which you want to download the bank transactions.
  • At last, click on the “Connect” option.

3. How can I activate a bank account in QuickBooks?

  • Firstly, you must move toward the settings page and then click the “Chart of Accounts” option.
  • Next, click on the “Gear” icon next to the printer icon, then select the “Include Inactive” option.
  • Search there for the account you want to use again, and last, click on the “Make Active” option.

4. How can I reset a bank account in QuickBooks online?

A:

  •  Login to your QuickBooks online account and move toward the settings page.
  • Thereon, click the “Account and Settings” option, and select the “Payments” tab.
  • Click on the “Change Bank” option, available in the deposits section, next to standard deposits.
  • Provide the routing and account number of the bank account you want to change.
  • At last, click on the “Save” option.

Revealed: Easiest Solutions to Fix QuickBooks Error 15106?

Are you also annoyed with facing the QuickBooks error code 15106? Well, every software is prone to errors, and the same is true for QuickBooks as well. In this blog post, we are going to cover the relevant and authentic information about what error 15106 is and how to get the error resolved. So, if you also want to get the error resolved, then stay tuned and read this informative blog post till the last word.

What is QuickBooks Error Code 15106?

The QuickBooks error 15106 occurs when the QuickBooks fails to open the updated file or either the updated file is damaged or corrupted. It is one of the most annoying errors, preventing the user from accessing the payroll software. Apart from these, the QuickBooks error code 15106 also arises when the user tries to update the QuickBooks payroll.

The QuickBooks error 15106 occurs with a pop-up display message as:

QuickBooks Error Code 15106

Read Also – Effective Ways to Fix QuickBooks Stopped Working after Windows 10 Update

Reasons Behind QuickBooks Error 15106?

Now, let’s look at the possible reasons why the QuickBooks error 15106 arises.

  • When the additional components required to update the QuickBooks payroll are missing from the installation file.
  • The background running antivirus software is disabling the QuickBooks to connect with the server.
  • When you are not using QuickBooks with the windows administrative rights.
  • The user account control settings are too high which are interfering with the QuickBooks payroll update process.

Read Also – How to Resolve Login Problems in QuickBooks Online on Chrome?

How to Resolve QuickBooks Error 15106?

Once you are cleared with the possible reasons why the error arises, then let’s have a look at the solutions you can easily follow step by step to resolve the QuickBooks error code 15106.

Solution 1. Run the QuickBooks with Administrative Rights

The first recommended solution for solving the QuickBooks error code 15106 is to run the QuickBooks in the administrative mode. To get that done, below listed are the steps you can easily follow to get the process done.

  • First, on your desktop screen, right-click on the QuickBooks desktop icon.
  • Now, click on the “Run as Administrator” under the list of options.
  • After that, it will ask you to provide the login credentials, and following it, click on the “OK” option.
  • You have now successfully logged in to your QuickBooks account in admin mode.

Now, try to update the QuickBooks payroll and check whether the error has been resolved. In case the error persists, then move on to the next solution.

QuickBooks Error Code 15106

Solution 2. Turn off User Account Control (UAC)

Here are the steps you can easily follow to turn off the user account control on your PC.

  • Firstly, open the windows run command by pressing the “Windows + R” keys together.
  • Type “Control Panel” in the insert box and then enter.
  • After that, click on the “User Accounts” option.
  • Moving ahead, click on the “Change User Account Control Settings” option.
  • Then, click on the “Yes” option and move the slider to the opposite direction to turn it off.
  • Moving ahead, click on the “Never Notify” option, followed by a click on the “OK” option.
  • At last, complete this process by performing a restart of the PC.

Once you are done with the above steps, launch the QuickBooks desktop and examine the presence of QuickBooks error code 15106.

QuickBooks Error Code 15106

Solution 3. Reset the QuickBooks Updates

Resetting the QuickBooks updates can be a solution to get the error resolved. Below are the steps you can follow to reset the QuickBooks updates.

  • Firstly, double-click on the QuickBooks desktop icon to launch the software.
  • Click on the “Help” tab option in the header menu.
  • After that, click on the “Update QuickBooks” option under the drop-down list.
  • Then switch to the “Options” tab.
  • Now, click on the “Mark All” option, followed by a click on the “Save” option.
  • Next, switch to the “Update Now” tab.
  • Check mark the “Reset Update” option and click on the “Get Updates” option.

After performing this procedure, try to update the QuickBooks payroll again, and in case you still face the error, move on to the next solution.

QuickBooks Error Code 15106

Read Also – Set Up Multi-User Network In QuickBooks

Solution 4. Delete the Pending QuickBooks Processes

Below are the steps you can follow to delete the pending QuickBooks processes.

  • First, open the task manager on your PC by pressing the “Ctrl + Shift + Esc” keys together.
  • Then click on the “Processes” tab and search for the QuickBooks requests.
  • After that, click on the “QuickBooks” options from the list.
  • At last, click on the “End Process” option.

After that, follow the same steps for all the pending QuickBooks processes.’

QuickBooks Error Code 15106

Solution 5. Rename the QuickBooks Update Folder

Here are the steps you can follow to rename the QuickBooks update folder on your PC.

  • Firstly, open the windows file explorer on your PC by pressing the “Windows + E” keys together.
  • Now, navigate to this location: C:\ Program Files\ Intuit\ QuickBooks(year)\Components (For 32 bit users) and for 64 bit users, navigate to this location, C:\ Program Files(x86)\ Intuit\ QuickBooks(year)\ Components.
  • After that, click on the “downloadqbXX folder” option. (The XX here stands for the version of QuickBooks that you are using).
  • Thereon, click on the “Rename” option.
  • At last, end this process by adding “.old” at the end of the name.

After performing the above steps, try to update the QuickBooks payroll again and check if the error has been resolved or not.

Solution 6. Delete the WebRoot Spyware Sweeper

  • Begin this process by going to the windows start menu.
  • Type “Control Panel” in the insert field and then press the enter button.
  • Moving ahead, under the list of options, click on the “Add/ Remove Programs” option.
  • Then, from the list of applications, click on the “WebRoot” option, followed by a click on the “Uninstall or Remove” option.
  • Now, click on the “Next” option.
  • Moving ahead, follow the on-screen instructions to complete the installation process.
  • After that, restart your computer and launch the QuickBooks desktop.

Then, try to update the QuickBooks payroll and check if for the presence of the error.

Solution 7. Repair the QuickBooks Desktop Installation Files

  • Firstly, run the windows run command by pressing the “Windows + R” keys together.
  • Now, type “appwiz.cpl” in the insert box and then hit the enter button.
  • Then, under the installed programs list, click on the “Uninstall/ Change” option, followed by “QuickBooks.”
  • Moving ahead, click on the “Change/ Remove” > “Next” option.
  • After that, select the “Repair” option and click on the “Next” option.
  • Once the repairing process ends, restart your PC and launch the QuickBooks desktop application.
  • At last, end this process by clicking on the click on the “Install Now” option.

Once you are done with the above steps, try to update the QuickBooks payroll. After following all the solutions mentioned above, the QuickBooks error code 15106 must be resolved at this stage.

Read Also – Hurry Up QuickBooks 2019 No Longer Supported

QuickBooks Error Code 15106

Summary

This blog post has provided authentic and useful information about the QuickBooks error code 15106. In case, while performing the steps mentioned above, you face any challenge, or if you have any other query related to the topic, then you can connect with us through the chat box, or you can write to us through mail at info@accountingwhizz.com. Our experienced and professional experts are available 24*7 at the help desk to attend to your query.

Set Up Multi-User Network In QuickBooks

QuickBooks is an excellent accounting software that can help your business get the desired growth by streamlining its accounting processes. The program offers many incredible accounting features and functions that can make your business accounting a less tedious task. Multi-user mode is also a time-saving feature in QuickBooks wherein multiple users can work on the same company file simultaneously. It not only saves your time & labor but also makes your accounting more comprehensive. However, to make the multi-user mode work, you need to set up this network in QuickBooks. Wondering how to set up multi-user mode in QuickBooks correctly? Read this full post to get the answer.

What Is QuickBooks Multi-user Mode?

QuickBooks multi-user setup allows multiple users to work on the same company file at the same time to make the workflow more efficient. In this network, a server computer hosts the company file, and the other computers (referred to as the workstations) access the company file from this computer. Only one central computer can host the company file. It is crucial to configure the multi-user network impeccably to avoid issues in accessing the company file. Here, you can get to know how to set up multi-user network in QuickBooks.

Standard Requirements To Set Up Multi-User Mode in QuickBooks

Now that you are familiar with the term multi-user mode, it is important to know the standard requirements before getting started with the steps:

  • Make sure that QuickBooks Desktop is installed on the server computer.
  • Log in as admin to check the Windows file permissions.
  • QuickBooks Database Server Manager, which plays a crucial role in hosting the company file on a network. It must be enabled.

Important Considerations Before Setting Up Multi-user Mode

Setting up a multi-user mode enables you to gain access to the data file over a network. It is imperative to have QuickBooks software installed on all the computers separately in the network. Before you set up a multi-user network in QuickBooks, below are some important considerations you need to keep in your mind:

  • QuickBooks Enterprise solutions enable 30 simultaneous users to access the company file.
  • If you are a QuickBooks Premier user, you can set a maximum of 5 users to access the data file.
  • In QuickBooks Pro, a maximum of 3 users can be set up in the multi-user mode configuration.

Also Read: QuickBooks Error H202

Procedure To Set Up Multi-User Network In QuickBooks?

After much has been discussed about the multi-user configuration, let’s dig into the actual steps to get the job done:

Step 1: Download & Install The QuickBooks Software

  • In the beginning step, you need to download the QuickBooks software from Intuit’s official website and save the downloaded file to a suitable location.
  • Next, proceed further with the installation using the on-screen prompts.
  • Here, you need to choose custom and network install as the install type.
  • To get the full version of the QuickBooks application on the server computer, choose I’ll be using QuickBooks Desktop on this computer, AND I’ll be storing.. option.
  • In case you want the server system to host files, choose the other option.
  • Follow the on-screen prompts to proceed further with the installation process.
  • Choose the multi-user host installation to finish the task.

Step 2: Switch To Multi-user Hosting

  • Launch the QuickBooks application to start the procedure.
  • Here, you need to make sure that QuickBooks is updated to the latest release.
  • Now, go to the File and choose the Utility option and click host multi-user access.
  • If the multi-user setup is already hosted, move to the next step.

Step 3: Configure The Firewall & Security Settings For Desktop

  • Click on the Start button and then search for Firewall.
  • When the Windows Firewall appears, select it and then choose the Advanced Settings option.
  • Thereafter, click inbound rules and choose the new rule option.
  • Moving ahead, choose the port and click Next.
  • Now checkmark the TCP option and then type in the ports based on your QuickBooks version.
  • In the New Inbound Rule Wizard, click on the radio button for Allow the connection option.
  • Checkmark the boxes for all the profiles and click Next to move ahead.
  • Give this name a rule and hit the Finish option.
  • In the end, you may open QuickBooks in multi-user mode.

Also Read: 8 Easy Solutions to Fix QuickBooks Error 80029c4a

Step 4: Share The Company File From Folder & Windows Access Permissions

  • Continuing the procedure, go to and right-click on the folder containing the QuickBooks file and select Properties from the drop-down menu.
  • Next, select the Security option and then click Edit.
  • Thereafter, choose QBDataServicesUserXX, click Allow and then choose the Full Control option.
  • Click Apply and OK, and it will take you to the last step of this section.
  • To finalize it, set up windows access permissions for sharing your company file.

Step 5: Set Up QuickBooks Database Server Manager

QuickBooks Database Server Manager is an important tool in QuickBooks, which enables multi-user access in QuickBooks. To set up the service in QuickBooks:

  • First of all, click on the Start button and then go to the Programs option.
  • Choose QuickBooks from the list to proceed further.
  • Thereafter, choose QuickBooks Database Server Manager and enable it.
  • Once chosen, click on the Scan folder tab.
  • In this step, you have hit on Add folder option.
  • Next, select the folder containing the QuickBooks Company File and then click OK to add a folder.
  • Hit Scan, and it will initiate the scanning process.
  • Click the Close option to finish.

Step 6: Enable Windows Admin Rights

If you are a Windows 7 or 8 user:

  • Press CTRL + R keys together and open the Control panel using the Run window.
  • Next, select User accounts and then click on Manage other accounts.
  • After that, click on Create a new account.
  • Now type the user name and select the admin tab to proceed.
  • Moving ahead, click on Create option.

For Windows 10 users:

  • Click on the Start tab and then go to the Settings option.
  • Next, select Accounts and then Family and other users.
  • Thereafter, you will see a Plus (+) icon at the bottom of the Settings window. Select this icon to add someone else to this PC.
  • Moving ahead, choose I don’t have this person’s sign-in information option and add a user without a Microsoft account.
  • Moving ahead, assign the account with a new user name and password.
  • Hit Finish, and the changes will be saved.
  • Here, you need to enable the admin privileges for the newly added user.
  • Now select the newly created account and then choose the account type.
  • After that, select the Admin tab, click OK, and then Save to finish.

Step 7: Switch To Multi-user Mode

After executing the steps correctly, you may now finally switch to the multi-user mode. Follow the below-mentioned steps:

  • First of all, go to the QuickBooks File menu, and clicking the Switch to multi-user mode will take you to the next step.
  • Thereafter, select Yes when you are prompted to do so.
  • Now in the multi-user setup information window, click the OK button.
  • Next, navigate to the company, and add the expected users by following the below mentioned series of selections:
  • Set up users and passwords >> Set up users >> Add users.

These steps will help you in setting up a multi-user network in QuickBooks Desktop and adding the intended users of the company file. Make sure that all the steps are followed with the utmost care and attention.

Benefits Of Multi-User Mode Network in QuickBooks

Multi-user network in QuickBooks is designed to enhance the user’s productivity in the program. Up to 30 users in the QuickBooks Enterprise solution can work on the same company file simultaneously and make the necessary changes and updates. This way, you can achieve a better workflow for your accounting management processes. QuickBooks multi-user mode can bestow you with multi-faceted benefits. Below is the list:

  • When multiple users can access and work on the same company file, the time and effort in the process are saved.
  • You may choose to access the company file from the server computer or use the office workstation as the host computer.
  • Working in multi-user mode eliminates the geographical bars and enables you to track your employees easily at any time.
  • Better collaboration in the multi-user network can help employees work with better clarity and removes ambiguity from the process.
  • When the productivity of the process increases, profits do increase proportionately.

Ending Words!

QuickBooks multi-user mode is an excellent feature in the program that offers a multitude of advantages. When multiple users work on the same company file, the workflow ultimately gets more efficient. This post elaborates on how to set up multi-user network in QuickBooks Desktop application. When not configured properly, you may experience a QuickBooks multi-user mode not working issue. Fortunately, you can get immediate help from our QuickBooks chat and email assistance channels and resume your accounting tasks.

Also Read: Revealed: Easiest Solutions to Fix QuickBooks Error 15106

QuickBooks Error Code 3371 Status Code 11118

QuickBooks is the number 1 accounting software, providing many benefits and features using the application. Although, it also shows numerous errors to its users, and the QuickBooks Error 3371 Status Code 11118 is among them. This error is mainly related to the ECML file when it gets damaged. If you also face the QuickBooks error 3371, you are at the right place. In this blog post, we will provide you with all the steps and methods you can follow to resolve the error.

What is QuickBooks Error 3371 Status Code 11118?

QuickBooks Error Code 3371 usually arises when a user reconfigures the desktop PC or activates the QuickBooks account for the first time. The error can also occur due to the missing or damaged Entitlement DataStore.ecml file. This error code occurs with a pop-up display message as:

Couldn’t Initialize license Properties: Error 3371, status code 11118, QuickBooks could not load the license data. It may be due to missing or damaged files.”

Possible Reasons Behind QuickBooks Error 3371 Status Code 11118

Now, let us understand the possible reasons due to why the QuickBooks error 3371 status code 11118 arises.

  • When the Entitlement DataStore.ECML file is damaged or corrupted.
  • The background running antivirus software is disabling the application from working efficiently.
  • When the user tries to access the file without saving it first.
  • The MSXML component of the windows is damaged or corrupted and is not allowing the QuickBooks to retrieve information.
  • Using an outdated version of Windows PC.
  • QuickBooks error code 80029c4a can also lead to the occurrence of the QuickBooks error 3371.
  • Several performance issues related to the QuickBooks desktop application.
  • When you have not completed the installation process of QuickBooks.
  • Some issues with the printing, emailing, and saving PDF from QuickBooks desktop.

Also Read: Resolve QuickBooks Error H101

Ways to Identify QuickBooks Error 3371 Status Code 11118

Moving ahead, let’s look at the symptoms of the error, through which you check to identify the QuickBooks error code 3371.

  • The tools in the QuickBooks desktop stop working suddenly at the same time.
  • QuickBooks desktop shuts down automatically.
  • When the PC’s window is frequently crashing.

How to Fix QuickBooks Error 3371 Status Code 11118?

Below listed are the solutions that you can easily follow step by step to get the QuickBooks error 3371 resolved.

Solution 1. Downloading the New Updates for PC’s Window

If you have not downloaded the new windows update on your PC for a long time, then your PC might not be able to meet the minimum requirements for running QuickBooks, which can further lead to the QuickBooks error code 3371 status code 11118.

For updating the PC’s windows to the latest release, below are the steps you can follow to get the task done.

  • First of all, go to the system settings on your PC.
  • Thereon, on the settings page, type “Windows update” in the search box.
  • Now, a drop-down list will occur on your screen. Then click on the “Windows update” option.
  • There, click on the “Check for Updates” option.
  • If there are any available updates, then it will show you the “Download Now” option.
  • After that, click on that option, and the downloading process of new updates will start on your screen.

Once the downloading process ends, then restart your PC and launch the QuickBooks desktop application. Thereon, check if the QuickBooks error code 3371 has been resolved or not.

Solution 2. Delete the ECML File

Below mentioned are the recommended steps that you can follow to delete the ECML file on your PC to resolve the QuickBooks error 3371.

  • At first, open the windows run command by pressing the “Windows + R” keys together.
  • Thereon, enter this location in the insert box > C:\ProgramData\intuit\Entitlement Client\v8.
  • After that, click on the “OK” option.
  • This will open windows explorer on your PC.
  • Now, search for the “EntitlementDataStore.ecml” and right-click on the file name.
  • Moving ahead, click on the “Delete” option.

Once you have deleted the ECML file, open the QuickBooks desktop software, and it will again ask you to register for the product. After that, try to perform the same task in which you face the QuickBooks error code 3371, and in case you are still facing the error, then jump on to the next remedy.

Read Also: Upgrade QuickBooks Desktop Pro Plus, Premier Plus, or Enterprise

Solution 3. Use the QuickBooks Install Diagnostic Tool

QuickBooks install diagnostic tool is an inbuilt tool inside the QuickBooks Tool hub. You must download the QuickBooks Tool Hub to use the diagnostic tool. Below is the procedure you can follow to use the QuickBooks Install Diagnostic Tool on your PC.

  • First, download the latest version of QuickBooks Tool hub (1.5.0.0) from the official website of Intuit products.
  • Now, open the downloaded file and follow the on-screen instructions to complete the installation process.
  • After that, double-click on the tool icon to open it.
  • Thereon, click on the “Installation Issues” available on the left side of the screen.
  • Now, click on the “QuickBooks Install Diagnostic Tool,” and the tool will start scanning the QuickBooks desktop software.
  • If the tool finds any discrepancy, then it will automatically resolve it.
  • Once the scanning process ends, then restart your PC, and after that, open the QuickBooks desktop.

If the QuickBooks error 3371 persists, move on to the next solution.

Solution 4. Run Quick Fix My Program Tool

For using the Quick Fix my program tool for solving the QuickBooks error 3371, below are the steps you can easily follow to get it done.

  • First, open the QuickBooks tool hub you downloaded in the previous solution.
  • There, click on the “Program Problems” option from the menu list available on the left side of the screen.
  • Now, click on the “Quick Fix My Program” option.
  • Then click on the “OK” option.
  • This tool will take 1 to 2 minutes to close all the background processes and run a quick repair on the program.

Solution 5. Clear the QBW32.exe Pending Process

  • First, close the QuickBooks desktop application.
  • After that, open the windows task manager by pressing the “Ctrl + Alt + Delete” keys together.
  • Thereon, click on the “Processes” tab option.
  • Now, right-click on the “QBW32.exe” under the list of pending processes.
  • Moving ahead, click on the “End Process Tree” option.
  • At last, end the process by clicking on the “OK” option.

Once you have cleared the pending requests with QBW32.exe, check if this method has helped you eliminate the error or is it still present.

Solution 6. Reinstall the QuickBooks Desktop Application

You can easily resolve any errors related to the QuickBooks files by deleting and reinstalling the QuickBooks desktop application.

Uninstalling QuickBooks Desktop:

  • At first, go to the windows start menu and then click on the “Control Panel” option.
  • Now, click on the “Programs and Features” under the control panel page.
  • There, under the list, search and select the QuickBooks desktop option.
  • Now, click on the “Uninstall” option.

Install the latest version of QuickBooks Desktop:

  • Download the latest version of QuickBooks desktop from Intuit’s official website.
  • Make sure to remember the product and license number of your QuickBooks subscription.
  • After that, open the QuickBooks.exe file.
  • Moving ahead, follow the on-screen instructions to complete the installation process.
  • At last, provide the product and license number and click on the “Next” option.

Solution 7. Clean the Junk Files

Below are the steps you can follow to perform a deep disk clean-up on your PC.

  • First, open the windows run command on your PC by pressing the “Windows + R” keys together.
  • Under the search box, type “Disk Cleanup” and hit the enter button.
  • After that, select the drive you want to clean up, followed by a click on the “OK” option.
  • Now, select the files which are holding huge space on your PC.
  • At last, click on the “OK” option to delete the junk files.

Wrapping Up

So, that’s all with today’s blog. In this blog post, we have provided all the information about QuickBooks error code 3371 status code 11118. Above, we have listed seven solutions that you can easily follow step by step to get the error resolved. In case, while performing the steps mentioned above, you face any challenge, then you can reach out to us through the chat box. You can write to us through mail at info@accountingwhizz.com. Our experienced and professional experts with in-depth knowledge about QuickBooks are available 24*7 at the help desk to attend your query.

Also Read: QuickBooks Error 103

How to Eliminate QuickBooks Won’t Open After Windows Update?

QuickBooks is a widely used accounting software developed by Intuit for small and mid-sized businesses. It offers reports and analytics so that you can track the performance of your business and implement the necessary changes. However, when using the program, you may receive multiple issues. One such program in QuickBooks occurs after updating your Windows. “QuickBooks won’t open after windows update” is a problematic condition in the application that can prevent you from running QuickBooks smoothly. To get rid of this error, read this post until the end.

Also Read: Upgrade QuickBooks Desktop Pro Plus, Premier Plus, or Enterprise

Factors That Can Promote “QuickBooks Stopped Working After Windows 10 Update” Error

if you are unable to run QuickBooks after updating your Windows computer, check for the below-given reasons:

  • Partial installation of the Windows upgrade can be a possible reason why QuickBooks has stopped working.
  • Updating Windows can evoke compatibility issues between QuickBooks and Windows.
  • When your Internet settings are not compatible with the QuickBooks program.
  • Corruption in the product registration (QBWUSER.INI) file can also give rise to the error.

Aftermaths of QuickBooks Won’t Open After Windows Update Error.

QuickBooks stores all your crucial accounting data and enables users to access it and name the necessary changes and updates. Besides, you need to add the daily business accounting information in QuickBooks to track the performance of your business. However, the inability to open the program hampers not only your workflow but also your peace of mind. To prevent this problem from affecting your workflow badly, you need to fix this error as soon as possible. If not, you may not be able to proceed even a step further with an ongoing or new task in QuickBooks. It is why we have listed some of the most effective solutions that can help you override this problem and get back to your routine accounting tasks.

How To Override The Error When You Are Unable To Open QuickBooks?

Knowing the possible reasons behind the error is half the job done. To troubleshoot the error, you need to perform the below-described solutions:

Solution 1: Download QuickBooks Tool Hub to Run Quick Fix My Program Utility

QuickBooks Tool Hub can be considered as the launcher of the important tools and utilities of the program. You can download the tool hub from Intuit’s official website and run the utility. Follow the below-listed steps:

  • Go to Intuit’s official website, download QuickBooks Tool Hub, and save it to a suitable location on your machine.
  • Thereafter, go to the download folder and double-click on the QuickBooksToolHub.exe file to start the installation.
  • Follow the on-screen instructions and agree to the terms and conditions to finish the installation.
  • Once installed, open the tool hub and click Program Problems.
  • Now locate and click on the Quick Fix my Program.
  • After completion of the task, restart QuickBooks and run it.

Also Read: How can I locate a missing QuickBooks transaction

Solution 2: Restore Windows To A Previous Version

If the updated version of Windows is causing trouble when opening QuickBooks, restore it to the previous version. It will remove the tools or applications that are installed after upgrading to Windows. These applications might stop QuickBooks from opening. To restore:

  • Click on the Windows Start icon in the first place.
  • Next, go to Settings and in this tab, click the Update and Security button.
  • Thereafter, go to the Windows and Security to proceed further.
  • Moving ahead, select the Recovery tab and then locate the Go back to an earlier built section.
  • Now click on the Get Started button and follow the on-screen prompts.
  • The previous steps will take you to the previous version of Windows.

Note: When restoring Windows to the previous version, you need to keep in mind that it is just a temporary solution. It is not a permanent solution as it prevents you from utilizing the upgraded features of Windows. Therefore, you need to move to a more effective solution.

Solution 3: Troubleshoot The Compatibility Issues
  • Take your mouse custom in the Windows search bar and then type QuickBooks.
  • When the program appears, right-click on it and select Open File Location.
  • In the next step, open the QuickBooks file location.
  • Thereafter, select and right-click on the QuickBooks company file and when the drop-down menu appears, click on the Properties option.
  • Here, in the Properties section, click on the Compatibility tab.
  • Next, move down and select a previously available version of the program from the Run this program in compatibility mode for option.
  • After changing the Windows compatibility mode, click Apply button and then OK to confirm.

Note: This solution will help you eliminate the error so that you can open the QuickBooks application. However, you may not be able to utilize the latest features in Windows.

Solution 4: Block Internet Connection To Be Accessed By QuickBooks Executable File

In this procedure, you need to block the QuickBooks Executable File (QBW32.EXE) from accessing the Internet. Keep in mind that disabling the internet access for QuickBooks can damage the program installation and harm your crucial accounting data. Before you proceed any further with this solution, make sure to keep the backup of your accounting data.

In addition, you may also choose to add a Firewall rule to stop the QuickBooks Executable file from accessing the Internet. After configuring this setting, you will be able to access the QuickBooks application without any hurdle. Below are the steps:

  • First thing first, open the Control Panel and then select Windows Firewall.
  • In the next step, you need to click on Advanced Settings.
  • The previous action will open the Windows Firewall with Advanced Security window.
  • In this window, click on Outbound Rules and then hit the Next button from the Actions pane.
  • Moving ahead, click on the New Rule option, and it will show up on the Windows Firewall with the advanced security option.
  • Click on the Outbound Rules.
  • When the Rule Type window appears, choose the Program radio button and hit the Next tab.

To Create The New Rule

  • On the Program window, mark the radio button for This Program Path and then specify the path in the program path box.
  • After entering the QuickBooks program path, click on the Next button.
  • When on the Action tab, choose Block the Connection option and click on Next.
  • Block the connection to QuickBooks executable file to proceed further.
  • Now on the Profile window, you need to select DomainPrivate, and Public options. Press Next when all three options are selected.
  • Specify profiles before you apply the rules you have created.
  • Next, go to the Name tab on Windows and give a suitable name to the new Firewall rule and click Finish.
  • Quit the Windows Firewall to finish this troubleshooting procedure.

Note: This troubleshooting will be effective in single-user mode. However, if you are not accessing the file on the same PC on which QuickBooks is running, you need to try a different solution.

Solution 5: Run QuickBooks Install Diagnostic Tool From Tool Hub

In the first solution, we have discussed the steps to download and install QuickBooks Tool Hub on your system. QuickBooks Install Diagnostic Tool is an important utility in QuickBooks software that detects and determines the issues related to QuickBooks installation. If the error is caused due to a partial or damaged installation, this tool can help. Follow the below-described steps:

  • Open QuickBooks Tool Hub and then select the Installation Issues tab.
  • Next, you need to locate and click on QuickBooks Install Diagnostic Tool. 
  • The tool will take up to 20 minutes to perform the troubleshooting.
  • Once the tool finishes its task, restart QuickBooks to check if the error is resolved or not.

Note: This one is a possible solution to eliminate the error; however, it is not assured that this solution will help in the error resolution.

Solution 6: Open QuickBooks Without The Company File

Sometimes, QuickBooks experiences trouble in opening the data file and gets stuck in a loop. To resolve this, open the data file manually. Perform the below-given steps:

  • Press the CTRL key and double-click on the QuickBooks Desktop icon when holding it.
  • Next, you will see a Window titled No Company Open. If not, try the same step without releasing the CTRL-key.
  • In the end, choose the data file you want to work with and open it.
Solution 7: Relaunch The QuickBooks Application

To relaunch the program, you need to run QuickBooks as an administrator. To run the program as an administrator, right-click on the QuickBooks Desktop icon and then select the Run as Administrator option. It is not necessary that it will work. In such a scenario, you need to repair the QuickBooks to update the installation permissions in order to open the QuickBooks application. Below are the steps:

  • Go to the Windows Start icon and then select the Control Panel.
  • Now select Uninstall a Program located underneath the Programs and Features tab.
  • Moving ahead, click on QuickBooks and select Uninstall/Change.
  • Once you are done, select the Repair option.
  • After following the above-given steps carefully, click on the Finish button to conclude the procedure.

Final Words!

Upgrading your Windows operating system is crucial in order to reap the benefits of the new and enhanced features. However, QuickBooks users may feel it difficult to open the software due to compatibility issues that are raised after updating Windows. If you are also stuck with the same error, then this post will help you in opening the program. However, if these steps don’t work for you for any reason, you may reach out to our expert QuickBooks professionals and get the needed help in a swift manner.

Also Read: Resolve QuickBooks Error H101

How Do I Upgrade QuickBooks Desktop Premier?

If you are also a user of the QuickBooks desktop account, then you might be thinking about how you can upgrade the QuickBooks desktop premier from an older to a new version. The QuickBooks desktop 2022 has already been released, and if you want to learn how to upgrade to the latest version, stay tuned and read this blog post until the last word.

Why Should You Upgrade the QuickBooks Desktop Premier?

Intuit each year releases a new version of the QuickBooks desktop to provide a seamless experience to the user for managing their business activities. There are many benefits of upgrading the QuickBooks desktop to the latest release, some of which are as follows.

  1. Solved old queries and problems.
  2. Better security and safety features.
  3. Fixed previous security bugs and loops.
  4. Real-time invoice tracking with the improved data file.
  5. Enhanced user experience and features.

How to Check QuickBooks Desktop Premier is Updated or Not?

Before you directly jump on to updating the QuickBooks desktop to the latest version, let’s look at how you can check if you are using the latest version of QuickBooks desktop premier.

  • First, double-click on the QuickBooks desktop icon to open the application.
  • Thereon, on the home page of the screen, press the F2 key on your keyboard to open the product information window.
  • Here, you can check for the current version and update you are using.

If you saw the version is not QuickBooks 22.0, then you are using the outdated version, and there is a need for updating it.

Read Also – How to Setup Chart of Accounts in QuickBooks?

How to Take the Backup of QuickBooks Current Version?

Once you have decided to upgrade the QuickBooks desktop to the latest release, you must take the backup of the QuickBooks current version files so that during the upgradation process, you will not lose any of your important data.

For getting the backup, below are the steps you can follow to get the process done.

  • First, open the current version of the QuickBooks desktop you are using on your system.
  • Afterward, log in to the QuickBooks company’s file with admin user access.
  • Now, on the application’s home page, click on the “File” menu option.
  • Then, click on the “Backup Company” under the drop-down list.
  • Moving ahead, click on the “Create Local Backup” option under the backup company window.
  • Now, a new pop-up window with the options for creating a backup window will be open on your screen.
  • You can select any of the options as per your choice and then click on the “Next” option.
  • If you want to make additional changes to your current backup settings, click on the “Options” button.
  • Otherwise, click on the “Next” option, and then the application will start preparing the backup of your files.
  • Once the backup gets saved, then close the current window.

Read Also – How to fix QuickBooks Online login problems on Chrome?

Upgrading to QuickBooks Desktop Latest Release

While upgrading the QuickBooks desktop to the latest release, you must ensure all the users have logged out from the company file. After that, below mentioned are the steps that you can follow to upgrade the QuickBooks desktop application to the latest release.

  • First, download and install the latest version of the QuickBooks desktop application.
  • Thereon, from the top left side of the screen, click on the “File” menu option.
  • Then under the drop down list, click on the “Open or Restore Company” option.
  • Then click on the “Open a Company” option.
  • After that, click on the “Next” option.
  • Then select the “Restore a Backup Copy” option, followed by a click on the “Next” option.
  • After that, click on the “Local Backup” option.
  • Then a new window will be open on your screen.
  • On that page, use the Browse option to navigate to the location where the company’s file is saved and click on the file to select it.
  • After that, select the “Open” option.
  • Once you select your company’s file, you must sign in to the admin user account.
  • Provide the login credentials and then click on the “OK” option.
  • Click on the “Update Now” option to upgrade the QuickBooks desktop.
  • After that, the upgradation process will be commenced.
  • During the upgradation process, you can see a progress bar on the screen displaying the status of the action.
  • Once the updating process ends, click on the “Done” option to end the process.

Now, your QuickBooks new version account is all ready to be used.

Read Also – How to Add a New QuickBooks Online User?

When Can’t the QuickBooks Desktop Purchase be Find While Upgrading?

If, while updating the QuickBooks desktop to a new version, the upgrade can’t find your QuickBooks desktop purchase, then it means the email ID you are using with the QuickBooks desktop account is different from the one you provided while purchasing the QuickBooks.

Here is what you can do in that scenario to fix this issue.

  • Search for the purchase confirmation email from QuickBooks on your registered email address.
  • Then provide your license number and product number and click on the “Continue” option to end the upgradation process.

How Can I Upgrade the QuickBooks Desktop Subscription?

To upgrade the QuickBooks desktop subscription to the latest release, below are the steps you can follow to get the process done.

  • First of all, when you are ready to upgrade the version, then click on the “Upgrade Now” option.
  • After that, select the “Keep old Version on My Computer” and click on the “Let’s Go” option.
  • Now, QuickBooks will automatically download, install, and activates the new version of QuickBooks.
  • Once the upgrading process, then clicks on the “Open QuickBooks” option.

Read Also – QuickBooks Stop Working after Updating Windows 10?

Ending Up

So, that’s all with today’s blog. We hope you find this blog informative. This blog post has covered all the essential steps you can follow to upgrade the QuickBooks desktop premier to the latest version. Above, we have described the steps you can follow to upgrade the QuickBooks. If you have any query related to the topic or any other QuickBooks error, then you can reach out to us through the chat box. You can also write us your query through the mail. Our experienced and professional experts with in-depth knowledge about QuickBooks are available 24*7 at the help desk to attend to your query.

How to Setup Chart of Accounts in QuickBooks?

Accounting is probably the backbone of any organization. If you want that your business runs smoothly and successfully, then you need to pay heed to the accounting part of your business. Doing that these days would call for the need for software. QuickBooks Software is one such software that takes care of all your accounting needs.

Every time you add or remove some accounts from your business transactions, keeping track of that record is important. When such a transaction occurs, it is extremely crucial that you carefully record it into the correct account. This is where the charts of account comes into the picture. They are particularly beneficial in recording any addition or deletion of an account from QuickBooks. Read the complete blog to understand in detail how to set up a chart of accounts in QuickBooks? This will guide you in keeping a better track of your business’s accounts.

What does Chart of Accounts really mean?

The chart of accounts literally means that it is a collation of all the accounts listed in your business. It is basically a list of all names and account numbers that are particularly relevant to your company. Furthermore, a typical chart of accounts has four categories. The primary account types in a standard chart of accounts are:

1.) Asset Accounts
2.) Liability Accounts
3.) Income Accounts
4.) Expense Accounts

Let us understand each of these accounts in detail:

1.) Asset Accounts

Asset accounts are basically entities that you own. It can be anything valuable you own like buildings, land, vehicles, valuables, inventory, bank accounts, notes receivable, etc. The chart of accounts organizes various asset accounts by arranging them into line items which makes it easy to track the multiple components of accounts easily. Asset accounts not only track each asset’s value but also follow each asset’s depreciation.

2.) Liability Accounts

Liability Accounts refer to current or short-term liabilities, accounts payable or bills, Payroll Taxes, bank loans, etc. Current Liabilities are outstanding payments that are due within the year. In contrast, non-current liabilities refer to outstanding payments which are due for more than a year.

Read Also – How to Resolve Login Problems in QuickBooks Online on Chrome?

3.) Income Accounts

Income is usually the most underutilized category of accounts. Some of the commonly used types of income accounts are as follows:

1.) Sales Income
2.) Rental Income
3.) Dividend Income
4.) Contra Income

While some types of income are easily generated, others require great time, effort, and expense. It is sensible to create different line items in the chart of accounts for different types of income. If you are able to visualize which events are in more cash flow, then you can very wisely manage your business.

4.) Expense Accounts

As the name suggests, expense accounts represent any money that you have spent. An expense account basically keeps track of the expenses that you incur. Below are some examples of expense accounts:

a.) Cost of Sales
b.) Advertising Expense
c.) Interest Expense
d.) Salaries or Wages

Read Also – Effective Ways to Fix QuickBooks Stopped Working after Windows 10 Update

Tips for classifying the chart of accounts

Before you understand how to set up chart of accounts in QuickBooks, here are a few tips or pointers that you should keep in mind:

1.) A number of accounting systems are preset with a chart of accounts. The lines of these preset accounts include headers that are numbered, such as 1450.2 and 630.8. These preset chart of accounts may be helpful for bigger firms but is usually of no use to entrepreneurs and small firms.

2.) You must use simple and straightforward titles in the line items that make sense to the reader

3.) Another point you should consider is that you must avoid creating a new line item for every transaction. In place of that, you should make use of the QuickBooks’ subheadings. For example, instead of creating a new line for PayPal fees, you can simply put it under the sub-account bank fees.

How to Setup Chart of Accounts in QuickBooks?

You can follow the below steps to set up the chart of accounts in QuickBooks:

1.) Choose the Lists- Charts of Accounts Command

QuickBooks will display the Chart of Accounts window on your screen.

2.) Pick the Account button

QuickBooks Desktop will display the account menu. When you hit the “Account Menu” option, your system screen will show the option of “New.”

3.) Add a new account by first choosing the account and then New

QuickBooks will display the Add New Account window on the screen

4.) Utilize the Account Type buttons

In QuickBooks, options for different account types are available such as Income, Loan, Fixed Asset, Expenses, etc. It is only through Accounts that you can come to know the location where the data of the accounts is being reported

5.) Click on Continue

After you have clicked on Continue, QuickBooks will display the second Add Account window on the computer screen. You should use the Account Name Box to give a very different name to the new account.

6.) Verify the Sub-Account

If you have chosen the sub-account of the check box, you need to give a name to the parent account

7.) Bank Account

If you use different currencies, then QuickBooks shall remind you to find all those customers, and bank accounts who utilize different currencies

8.) Get Account info

In the Add New Account in QuickBooks, the credit card account type will help in storing all card details.

9.) Acknowledge the Tax Line

On a company’s tax return, the cash account balance shall be recorded. You can add a bank account still by making use of the Tax Line mapping drop-down list.

10.) Save New Account

Finally, you need to click on Next so that it saves the account information, and then it will display the “Add New Account” window. Furthermore, when both these accounts are set up, the new accounts will appear on the chart of accounts.

Wrap Up

We hope you have understood the steps mentioned above for “How to Setup Chart of Accounts in QuickBooks?” issue. Employing the said methods, you can very easily navigate this issue of setting up a Chart of Accounts in QuickBooks.

We are part of a team of highly skilled and capable professionals who are doyens of solving such QuickBooks issues. They are available 24*7 at your service and attempt to provide you with the best assistance in issues pertaining to QuickBooks software. You can always contact us through chat on our website or can drop us a mail . We look forward to hearing from you!

Frequently Asked Questions

Q1. What does the chart of accounts mean in QuickBooks?

Ans. A list of all accounts that enable QuickBooks to track your financial information is called a chart of accounts. These accounts are used to classify the transactions from sales forms to tax reforms. Each account holds some transaction history and lets you know how much money you have or how much do you owe to somebody.

Q2. Is there a standard chart of accounts? If yes, what is it?

Ans. Yes, a standard chart of accounts is a list of all accounts that comprises a company’s general ledger. Furthermore, it is a filing system for categorizing as well as classifying all transactions in accordance with the accounts that they affect.

Q3. How is a chart of accounts different from a general ledger?

Ans. The general ledger can be thought of as the record of all financial transactions in the organization, whereas a chart of accounts is a list of all accounts that are utilized in the organization’s accounting system.

Q4. What is the order of listing charts of accounts?

Ans. As in financial statements, in a chart of accounts also, accounts are shown in the same order. Consequently, assets and liabilities come first, while revenue and expenses follow behind.

Q5. How are charts of accounts classified?

Ans. The charts of accounts are classified into five major categories:
1.) Asset accounts
2.) Liability accounts
3.) Equity accounts
4.) Revenue Accounts
5.) Expense accounts

Q6. What use does a chart of accounts have for the company’s management?

Ans. A chart of accounts is used to keep & manage a record of transactions in the organization. It also is a major indicator for investors and shareholders who can gain clearer insights into the company’s financial health. Each chart of accounts contains a name, brief description, and an identification code which makes it easier for chart readers to locate specific accounts.

Related Blogs –

Fix QuickBooks POS Database Server not Found Issue

How to Reset QuickBooks Administrator Password?

Where is the Gear Icon in QuickBooks?

How to Add a New QuickBooks Online User?

Have you also recently started to use the QuickBooks online services? If yes, then you might be thinking about how to create or add new users to the QuickBooks Online account. If you are also among them, you are at the right place. In this blog post, we are going to provide you with all the information about how to add a new user to the QuickBooks Online account. So, if you also want to learn to create a new QuickBooks online user, then stay tuned till the end of this informative blog post.

How Can I add a New QuickBooks Online User?

Below are the steps you can follow to create a new QuickBooks online user.

Step 1. Manage the Users Menu

  • The first step is to login to your QuickBooks Online account.
  • After that, under the home page screen, click on the “Gear” menu option.
  • Now, click on the “Manage Users” option under the “Your Company” section under the list.

Step 2. Go To The User Settings

  • After that, under the manage users page, open the user settings menu list by clicking on the “New” option.

Step 3. Select Your User Type

  • Moving ahead, select the type of account in you want to add.
  • If the type of account you want to add is missing from the list, select the first option, i.e., “Regular or Custom user,” and click on the “Next” option.

Step 4. Allow Users Access Rights

  • Once you click on the “Next” option in the previous step, you must select the user’s permission.
  • If you want to permit full permission to the user, select the “All” option; otherwise, select the “Limited” option to select the items you want to access.

Read Also – How to Resolve Login Problems in QuickBooks Online on Chrome?

Step 5. Allow User’s Administrative Rights

  • You can also provide administrative rights to the users to access your QuickBooks company’s file.
  • Through the administrative rights, users can also view the manage users tab, but they cannot add or delete users or cannot even change the access rights.
  • Select the “View manage users” option under the user management heading to get this done.
  • After that, under the Company information settings, click on the “View Only” option so that the users can access the company information.
  • If you want to allow your new user to edit the company information, click on the “Edit” information.

Step 6. Provide New User’s Email Address

  • Moving ahead, you have to provide the new user’s email address along with its first and last name.
  • After entering the details, click on the “Next” option.

Step 7. Finish Adding New User

  • Once you complete the above steps, click on the “Finish” option.
  • Afterward, the user will receive a mail on their email address and a link to your QuickBooks online account.
  • At last, the users have to create a new login name and password to use the QuickBooks online account.

Read Also – Effective Ways to Fix QuickBooks Stopped Working after Windows 10 Update

How to Give Access to QuickBooks Online Account to Accountant?

So, here are the steps that you can follow to provide access to your QuickBooks online account to the accountant.

Step 1. Send Invitation to the Accountant

  • First, on your QuickBooks Online account, go to the Manage Users screen.
  • Then, from the top side of the screen, click on the “Accounting Firms” option.
  • Moving ahead, enter your accountant’s email address in the insert box.
  • At last, click on the “Invite” option.

Note: There is no need to invite two accountants from the same company, and your accountant can easily share their access with other bookkeepers within the company.

Step 2. Complete the Setup Process

  • Once you send the invitation link, your accountant will receive a new mail containing a link to sign to your QuickBooks online account.
  • As soon as your accountant sign in to the QuickBooks account, their status on the manage user page will turn from Invited to Active.
  • After that, your accountant will automatically get administrator rights to all the areas of your online QuickBooks company.

How Many Users Can Be Added In The QuickBooks Online Account?

Here is the complete list of users that can be added to the different versions of the QuickBooks online account.

Simple Essentials Plus Advanced
Standard and Admin users 1 3 5 25
Accountants 2 2 2 3
Time Tracking Only Users 0 Unlimited Unlimited Unlimited
Reports Only Users 0 0 Unlimited Unlimited

How Can I Change User’s Access in QuickBooks Online Account?

If you want to change or modify the access of any of the users, then below are the steps you can follow to get it done.

  • First, log in to your QuickBooks online account with the profile, which has administrative rights.
  • After that, on the home page of the screen, click on the “Settings” option.
  • Then click on the manage users option and then select the account in which you want to make some changes.
  • Under the action column, click on the “Edit” option.
  • Moving ahead, click on the “New User Type” option under the drop-down menu list.
  • Select the required user settings and click on the “Save” option.
  • At last, the user has to log out from their account and log in again to check the implemented changes.

How Can I Delete A User in QuickBooks Online Account?

So, here are the steps that you can follow to delete a user in the QuickBooks Online account.

  • First, log in to your QuickBooks online account with login credentials of the account with administrative rights.
  • Moving ahead, click on the “Manage User” option and select the user you want to delete.
  • After that, under the action column, click on the “Arrow Icon” and then click on the “Delete” option.
  • At last, a new pop-up confirmation window will be open on your screen. There again, click on the “Delete” or “Yes” option.

Summing Up

So, that’s the end of today’s blog. In this blog post, we have covered all the steps about how you can add a new QuickBooks Online user. You can easily perform the earlier steps to add a new user to your QuickBooks Online account. In case, while performing the steps mentioned above, you face any challenge or error, then feel free to reach out to us through the chat box. You can also mail us your query. Our experienced and professional QuickBooks experts are available 24*7 at the help desk to provide the best solution for your problem.

Effective Ways to Fix QuickBooks Stopped Working after Windows 10 Update

Are you also facing glitches while opening the QuickBooks desktop application after updating to the latest Windows 10? If yes, we are here to take you out of this problem. In this blog post, we will provide you with all the information about why QuickBooks stopped working after the windows 10 update and the solutions you can follow to resolve the error. So, if you also want to fix this problem, stay tuned and read this blog post until the last word.

Why Does QuickBooks Stop Working after Updating Windows 10?

Here is the list of the possible reasons why QuickBooks may stop working after the windows 10 update.

  • When the QBUSER.INI file gets damaged or corrupted after a windows update.
  • QuickBooks is not compatible with the new windows update.
  • The company’s name is too long.
  • Poor internet connection.
  • The background running antivirus software is disabling the QuickBooks from working properly.
  • An issue with the QuickBooks installation files.

How to Identify QuickBooks Stopped Working After Windows 10 Update Problem?

So, below mentioned is the list of symptoms you can check to identify if you are facing the QuickBooks stopped working error after the windows 10 update.

  • The QuickBooks desktop application starts hanging or does not responds to commands.
  • Not able to open the QuickBooks company’s file.
  • QuickBooks suddenly shutdowns automatically.
  • PC’s windows is frequently crashing.

Read Also – How to Add a New QuickBooks Online User?

How to Fix QuickBooks Stopped Working After Windows 10 Update?

Once you are cleared with all the possible reasons why the error arises and the symptoms to identify the error, let’s look at the different methods for fixing the QuickBooks stopped working problem after the windows 10 update.

Solution 1: Restore the Old Version of Windows 10

If the new updates of Windows 10 are not compatible with the QuickBooks Desktop application, then the only option that the users have is to restore the previous version of windows 10. So, for restoring the old version of Windows 10, below are the steps you can follow to accomplish the process.

  • First, go to the windows start menu by pressing the Windows key on your keyboard.
  • Thereon, search and click on the windows settings option.
  • After that, click on the “Update and Security” option under the settings page.
  • Moving ahead, click on the “Recovery” option, which is available on the left side of the screen.
  • At last, click on the “Get Started” option, which is available under the “Go back to an Earlier Build” heading.

After performing the above-mentioned steps, you have now easily restored the old version of Windows 10. Now, open the QuickBooks desktop application and check if QuickBooks is opening or does the problem still exists.

Solution 2: Rename the QBWUSER.INI File

So, below mentioned are the steps that you can follow to rename the QBUSER.INI file.

  • The first step is to navigate to the location where the QBWUSER.ini file is saved i..e Users > [Name} > App Data > Local > Intuit > QuickBooks.
  • After that, right-click on the QuickBooks file name and select the “Rename” option.
  • The next step is to type “.OLD” at the end of the company’s file name. The new name of the company’s file will be “QBUSER.INI.OLD.”
  • After that, rename the EntitlementDataStore.ecml file similarly.

Once you have renamed both files, open the QuickBooks desktop application, and if the error persists, jump on to the next solution.

Read Also – How to Resolve Login Problems in QuickBooks Online on Chrome?

Solution 3: Eliminate the QBW32.EXE Pending Process

Here are the steps for closing the QBW32.EXE pending process in the task manager.

  • First, go to the windows start menu by pressing the Windows button.
  • Afterward, type “Task Manager” in the insert box and press the enter button.
  • Moving on, click on the “Details” tab option.
  • Then, search for the “QBW32.EXE” file under the list and right-click on it.
  • Then click on the “End Task” option to close the pending process of the QBW32.EXE file.

Solution 4: Create a New Admin User in your PC’s Windows

If there are installation problems, QuickBooks might stop working after the windows 10 update. In this situation, adding a new windows admin user to your PC can help you to fix the problem.

Below are the steps you can follow to add a new windows admin user to your Windows account.

  • To begin the process, go to the windows start menu.
  • Then, under the applications drop-down list, click on the Settings option.
  • Now, search and click on the “Accounts” option under the windows settings.
  • Moving on, select the “Choose Family and Other Users” option.
  • Then, under the list of options, click on the “Add Someone else to this PC” option.
  • After that, enter the admin details, and with that, you have successfully created a new windows admin user on your PC.

After you have performed the above steps, check if you can open the QuickBooks Desktop application. In case the problem persists, then move to the next solution.

Read Also – How to Fix QuickBooks Not Responding?

Solution 5: Run QuickBooks Install Diagnostic Tool

The QuickBooks tool hub can help you to resolve many QuickBooks errors. Although, this tool is available under the QuickBooks tool hub. So, here are the steps that you can follow to run the QuickBooks install the diagnostic tool on your PC.

  • First, download and install the QuickBooks tool hub from the Intuit official product page.
  • Once you have installed the tool, double-click the tool icon to open it.
  • After that, click on the “Installation Issues” option.
  • Then, under the list, click on the “QuickBooks Install Diagnostic Tool.”
  • The tool will start scanning your files, taking around 20 to 25 minutes.

At last, once the scanning process ends, then restart your PC and try to launch the QuickBooks desktop application.

Solution 6: Disable Internet Access to QuickBooks

Before you jump on to this method, we suggest you take a backup of your QuickBooks company’s file as blocking the internet access for QuickBooks can damage the QuickBooks installation and its data.

Below are the steps you can follow to disable internet access to QuickBooks.

  • At first, go to the windows start menu and under the list of applications, click on the Settings option.
  • Under the PC’s settings page, click on the “Control Panel” option.
  • Then under the control panel screen, click on the “Windows Firewall” option.
  • Moving ahead, click on the “Advanced Settings” option, which is available on the top left side of the screen.
  • The next step is to click on the “Outbound Rules” option, which is available under the “Windows Firewall With Advanced Security” window.
  • Now, click on the “New Rule” option and select the “Program” radio button.
  • After that, click on the “Next” option.
  • Now, checkmark the “This Program Path” radio button available under the “Program” window and enter the following paths in the program path insert box.
  • For 64-bit Windows installation, navigate to C:\Program Files (x86)\Intuit\QuickBooks 2010\QBW32.EXE.

  • For 32-bit Windows installations, navigate to C:\Program Files\Intuit\QuickBooks 2010\QBW32.EXE.

  • Once you are done with program paths, click on the “Block Connection” option, followed by a click on the “Next” option.
  • Afterward, select the “Domain, Private and Public” option under the profile window and click on the “Next” option.
  • Thereon, a new window with the “Name” heading will be open on your screen. There, type “Block QuickBooks Internet Connection” in the name insert box, followed by a click on the “Finish” option.
  • At last, end this process by closing the windows firewall.

You have now easily disabled the internet access to QuickBooks. From now, the new Windows 10 update will not cause any problems while using the QuickBooks desktop application.

Important: This step is only useful when the user wants to open the QuickBooks data file stored on the same PC where the QuickBooks desktop is working. If another PC is hosting the QuickBooks data file, then this procedure cannot help you solve the problem.

Wrap Up

In this blog, we have tried our best to provide authentic and useful information about why you may face the QuickBooks stopped working after the windows 10 update. Above, we have listed all the possible reasons behind the problem among the solutions that you can follow to resolve the problem.

If you have any query related to the topic or any other QuickBooks error, then you can reach us through the chat box. You can also mail us your query. Our experienced and professional QuickBooks experts will be happy to attend to your query.

How to Resolve Login Problems in QuickBooks Online on Chrome?

The most renowned accounting and bookkeeping software, QuickBooks, is used by millions of people every day. With its two versions, Desktop and Online, it is better and accessible to everyone. In addition to that, you can even run QuickBooks on Single-user mode or multi-user mode, depending on how many people want to work on one company file. However, this software to faces some issues at the time with both versions.

If you are also a QuickBooks Online user, then you must have faced some login issues. If this is so, and you are here looking for how to fix QuickBooks Online login problems on Chrome, then this post is for you. Here we will discuss the reasons and solutions for this problem.

What Are QuickBooks Online Login Problems on Chrome?

When you use Google Chrome to run QuickBooks Online, there is a chance that you face problems at the time of login. In fact, this can even happen when you put in your correct credentials. The error message appears in a red box stating, “Account Services Unavailable, please try back later.” This text can appear on your screen because of an issue with security.

This error can occur in other ways too. They are:

  • The loading icon appears before you, but nothing actually works.
  • Another problem could be because of Chrome. It might redirect you to the login window while you are working on the application.
  • Lastly, you might also encounter an issue because of a lack of security.
  • Also, the page can keep loading but won’t work.

What Caused QuickBooks Online Login Problems on Chrome?

QuickBooks Online Login Problems can occur because of a number of reasons. However, here is a list of the most noticed causes:

  • Firstly, this can happen if another user is operating on the same account somewhere else.
  • It can also occur if your Chrome acts out and bring you back to the login page.
  • Additionally, if you forgot to log out or did it inappropriately of QuickBooks Online the last time
  • An issue with the firewall settings can also be the source of this issue.

Read Also – How to Fix QuickBooks Not Responding?

Fix QuickBooks Online Login Problems on Chrome

ogging into your account is the very first step in managing your accounts on QuickBooks. If you face any problem here itself, it can be something to worry about. However, QuickBooks Online login problems are not major, and one can resolve them easily.

Here are some solutions that you can try to fix the problem:

Solution 1: Use Another Browser

QuickBooks Online Login Problems on Chrome

If the root cause of your issue is because of your web browser, then solving Chrome issues has the simplest solution; just don’t use it. Instead of running your QuickBooks Online on Chrome, you can log into your account with Firefox, Internet Explorer, or Safari (For Mac).

Solution 2: Try Incognito mode

Resolve Login Problems in QuickBooks Online

People who wish to use Chrome only can try using Incognito mode. In incognito mode, there are no cache files or search history that can create a hindrance in its operations. To open an incognito window, press Ctrl+Shift+N. You can also access the incognito mode with the help of the following steps:

  • From the homepage of your Chrome, locate the Customize and Control icon.
  • Once you find the option on the top right corner, click on that.
  • Here, from the available list, select the New Incognito Window.
  • Now, a new grey window will appear on your screen.
  • Open and log in to QuickBooks from here now.

Solution 3: Clear Search History and Cache

Clear Search History and Cache

If you do not want to use incognito mode, you can try and clear all the existing history.

  • Open your web browser and click on the three vertical dots.
  • You will find these at the top right corner, beside the search bar.
  • On the Settings page, select the three vertical lines and click on Privacy and Security.
  • From the available list of options, choose Clear Browsing Data.
  • Now, make sure you have tick-marked all the available options in the pop-up window.
  • Finally, hit the Clear Data button, and you are done.

Read Also – How to Add a New QuickBooks Online User?

Solution 4; Add New User to Chrome

Add New User to Chrome

If none of the aforementioned solutions for QuickBooks Online login problems work for you, create a new user account on Chrome and open QuickBooks Online with the same.

  • To initiate the process, head to Google Chrome.
  • Now, on the homepage, look for the user’s icon. It is located beside the Settings option in the top right corner.
  • When you click on the same, you will find the ADD + option.
  • Thereafter, Chrome will open a new window for you.
  • Here, you can log into your other existing account or create a fresh account if you do not have one already.
  • Lastly, open QuickBooks in the same window.

Solution 5: Change Chrome’s Privacy and Internet Security Settings

There is a possibility that the reason why you need to fix QuickBooks Online Login Problems on Chrome is because of a restriction from the privacy and internet security settings.

This is how you can make changes to the same:

  • Open the Start menu on your desktop.
  • Here, in the search bar, type Internet Options and hit the Enter key on your keyboard.
  • You will enter a new window with internet settings options.
  • Thereafter, go to the Security tab and select the Internet option.
  • Now, you need to set the leveler to the Medium-High range.
  • Finally, when you make the edits, hit the Apply button to save the changes.

Solution 6: Check the SSL Settings on your Browser

This is an advanced solution that you need to fix QuickBooks Online Login Problems on Chrome if none of the above works for you.

  • Go to the Windows icon and search for Internet Options and wait for the pop-up window to open.
  • Here, from the options available on the menu bar, select Advanced.
  • Furthermore, you will find a long list of options. You need to look for SSL 2.0 and SSL 3.0.
  • Select these options, and finally, hit OK.

Read Also – Effective Ways to Fix QuickBooks Stopped Working after Windows 10 Update

Setting 7: Edit Additional Internet Privacy Settings

For the people who still haven’t resolved QuickBooks Online login problems, you now need to make some edits to the internet privacy settings.

  • Once you have set the bar to medium-High, you need to let QuickBooks have access.
  • To initiate the same, simultaneously press the Ctrl key and R key from your keyboard.
  • This will take to you the Run dialog box.
  • Here, in the given space, enter inetcpi.cpl and click OK.
  • After that, go to the Advanced option from the menu bar and look for Security.
  • Finally, unmark Do Not Save Encrypted Pages and save the settings.

Final Statement

QuickBooks is a human-made software and therefore faces issues too. Its online version usually creates problems while logging in. If you are also stuck with the same and want to know how to fix QuickBooks Online Login Problems on Chrome, you are at the right place. Here, you have jotted down 7 solutions for you. These can assist you and help you resolve the problem real quick.

In case none of these work for you or you get stuck somewhere in between, you can ask for our assistance. Dial our cus