How to Fix QuickBooks Web Connector Error QBWC1085?

QuickBooks Web Connector is an application for Microsoft Windows that enables web-based applications to share data with QuickBooks desktop products, including QuickBooks financial software and QuickBooks Point of Sale. Integrating a web service with a web connector must implement a set of methods defined in QuickBooks Web Connector WSDL.

Although, users are also facing many errors while using the application, and QuickBooks Web Connection error QBWC1085 is one of the common errors. QBWC1085 arises when the QWCLOG.TXT log file is damaged or corrupted. If you also face the QBWC1085 connection error, this blog will be crucial for you. In this post, we will cover all the aspects related to the QuickBooks web connector error. So, read this blog till the last word.

Why Does QuickBooks Web Connector Error QBWC1085 Arises?

Let’s take a look at some possible reasons why a user may encounter a QuickBooks web connector not working issue.

  • QuickBooks is unable to write the web connector log file.
  • A damaged software or unreliable web connector program is using TXT files.
  • Internal components of QuickBooks are damaged or corrupted, resulting in the QBWC1085 error.
  • QuickBooks web connector is trying to access the information to the QuickBooks desktop through a different third-party web-based program.
  • Not accessing QuickBooks with administrative rights.
  • Using an outdated version of QuickBooks web connector application.
  • The missing log file can also be a reason why the error arises.

Read Also: QuickBooks Error H202

Symptoms of QuickBooks Web Connector Error QBWC1085

Let’s discuss the signs and symptoms through which you can easily identify the QBWC1085 error.

  • QuickBooks web connector stops working.
  • QuickBooks software is not working efficiently.
  • A pop-up display message appears on the screen showing the error code QBWC1085.
  • PC is not responding to the new commands provided by the mouse and keyboard.
  • PC’s window is frequently hanging.

How to Troubleshoot QuickBooks Web Connector Error QBWC1085?

After having a clear understanding of the reasons and symptoms of the error, then let’s take a look at the solutions that you can carry out to eliminate the QuickBooks web connector QBWC1085 error.

Note: Before starting with the troubleshooting methods, you must enable the QuickBooks web connector.

Solution 1. Renaming the QWCLOG.TXT File

The first solution we recommend for troubleshooting QuickBooks web connector errors is renaming the QWCLOG.TXT File. Here are the steps that you can execute to rename the File.

  • First, navigate to the windows taskbar, and there you have to right-click on the QuickBooks web connector icon.
  • Thereon, click on the “Exit” option, and then the Windows file explorer will open on your screen.
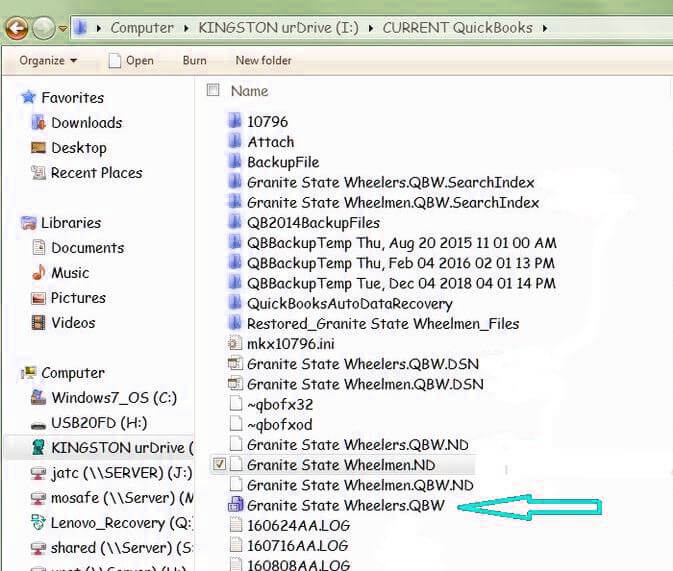
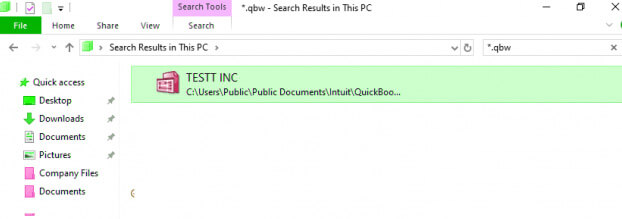
  • After that, navigate to the location where the QWCLOG.TXT File is saved, i.e., C:\ Program Data\ Intuit\ QBWebConnector\ log folder.
  • Now, search for the QWCLOG.TXT File and right-click on the file name.
  • Thereafter, click on the “Rename” option.
  • Then, change the file name to “QWCLOGOLD.TXT” and click on the “Save” option.
  • Followed by the above steps, restart the web connector program on your device.
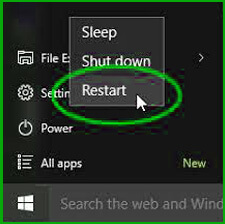
  • At last, restart your PC and launch the software again.

After performing the above steps, verify whether the QuickBooks web connector error QBWC1085 has been eliminated. If you still face the error, move to the next solution.

Solution 2. Connect the QuickBooks Company’s File with the Third Party Program

Below are the steps you can implement to connect the company’s File with the third-party program.

  • The first step is to open the windows run command on your PC by pressing the “Windows + R” keys together.
  • Thereon, type “MSConfig” in the search box and then click on the “OK” option.
  • Followed by the above steps, click on the “Startup Tab” option.
  • Here, search there for the QuickBooks web connector and then check to mark the box checkbox.
  • After that, click on the “Apply” option, followed by a click on the “OK” option.
  • At last, end this process by restarting the PC.

Once you are done with the steps mentioned above, check if this method has helped you eliminate the QBWC1085 error. If you still face the error, move to the next solution.

Solution 3. Deleting Web Connector From the Start-up Menu

If you have not connected the QuickBooks software with a third-party program, then you can delete the web connector from the startup menu to eliminate the error.

Given below are the steps that you can follow to do so.

  • First of all, log in to your PC in the administrative mode.
  • After that, navigate to the windows startup menu, i.e., C:\ Program Data\ Microsoft\ Windows\ Start Menu\ Program\ Start-Up.
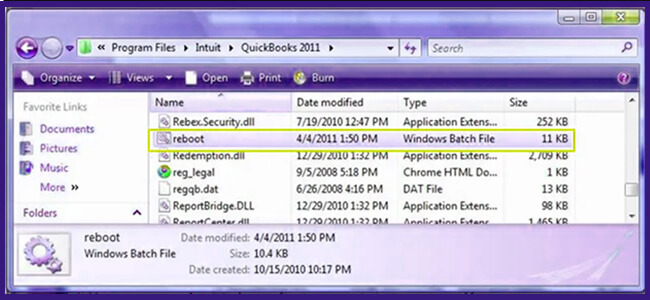
  • Now, the next step is to delete the QuickBooks web connector file.
  • At last, restart your system and launch the QuickBooks software.

Read Also: How to Void a Check in QuickBooks

Various Others QuickBooks Web Connector Errors

Let’s take a look at the common QuickBooks web connector errors which are as follows;

  • QBWC1005, 1006: QuickBooks web connector fails to run.
  • QBWC1007, 1008 or 1009: An error arises while connecting to QuickBooks.
  • QBWC1011: The application is missing from the registry.
  • QBWC1016: No application was selected for updating.
  • QBWC1018, 1019: No application is available at the selected time.
  • QBWC1020: The web connector fails to run the pre-scheduled jobs.
  • QBWC1022, 1023 or 1024: An error arises while connecting with QuickBooks.
  • QBWC1030: The application login password is missing.
  • QBWC1032: Unable to find the application in the registry to complete the scheduled update.
  • QBWC1033: QuickBooks web connector fails to run the QWCLOG.TXT File.
  • QBWC1035: DNS (Localhost) fails due to extension
  • QBWC1037: The following error or warning message appears while checking the version of the QuickBooks web connector.
  • QBWC1038: Need a master key to continue.
  • QBWC1040: The web connector fails to provide a valid username or password.
  • QBWC1048: QuickBooks web connector fails to verify the web application service certificate.
  • QBWC1085: QuickBooks fails to write the log file.

To Summarize

Through this post, we have tried our best to provide you with authentic and useful information about how you can eliminate QuickBooks web connector errors. You can easily carry out the steps mentioned above to fix QuickBooks Web Connector Error. If you still have any queries related to the topic, you can get instant help from our QuickBooks experts through the chat box.

How to fix QuickBooks error -6123, 0?

QuickBooks, although a rather beneficial software for accounting, is not immune to errors. While operating, users complain of errors that creep into the software. When a user attempts to restore the company file from a backup, the ill-fated QuickBooks Error 6123, 0 appears. The problem disrupts the activities of the QuickBooks company file and emerges out of nowhere with no prior warning.

The troubleshooting techniques described in this article can be used to quickly fix the technical issues that are the cause of QuickBooks error 6123,0. You may save a lot of time by determining the causes of errors, so we’ve also provided a list of the most frequent causes of QuickBooks error 6123, 0. For comprehensive troubleshooting information, read the blog till the end..0

What is Error Code 6123, 0 in QuickBooks?

Once the QuickBooks Desktop application encounters error code 6123,0, “Error: -6123, 0” is the error message that QuickBooks shows. Users can run QuickBooks File Doctor and update QuickBooks Database Server Manager as part of the usual troubleshooting steps to fix company file issues. Unfortunately, basic troubleshooting alone isn’t always sufficient to remove error codes like 6123, 0, and you’ll need to employ more solutions to fix the problem. The following describes the error as it appears in QuickBooks:

QuickBooks Error 6123 (Error Message)

What Results in a QuickBooks Error 6123, 0?

The following factors are to blame for QuickBooks Desktop error 6123,0.

1. One of the common causes of QuickBooks displaying error message 6123,0 is the use of an outdated QuickBooks Desktop application.
2. Damaged QuickBooks company files are responsible for various other 6000 series issues in addition to error 6123,0 in QuickBooks.
3. You can see error 6123,0 in QuickBooks if you attempt to restore the backup from an online storage provider like Dropbox.
4. If the Windows version of QuickBooks Database Server Manager is not active, then the issue can occur.

Top 5 Solutions to Fix QuickBooks Error 6123,0

Solution 1: Run the QuickBooks Desktop Update

If QuickBooks Desktop is not up to date, it not only invites mistakes but also leads to decreased performance. By keeping QuickBooks updated, you can be certain that the software is free of bugs and other problems that could detract from the end-user experience. The next troubleshooting step should be used if updating QuickBooks did not solve error 6123, 0 in the company file.

Solution 2: Install and Run the QuickBooks Tools Hub

The QuickBooks Tool Hub is a collection of various tools that may be used to fix practically every mistake that QuickBooks faces, as you may already be aware. A utility called My Program was created with the specific purpose of updating QuickBooks installations and re-registering the installation files, which aids in removing common company files and program errors like error 6123. Download and install QuickBooks by adhering to the directions provided below.
1. Firstly, Download the QuickBooks Tools Hub.
2. Secondly, Exit the QuickBooks Desktop program by choosing that option from the File menu.
3. Thirdly, Open the QuickBooksToolsHub.exe setup file that you downloaded before.
4.) Thereafter, To finish the installation, adhere to the instructions on the installation display screen.
5.) Subsequently, On your desktop, double-click on the QuickBooks Tools Hub icon.
6.) Thereafter, Click on the Quick Fix my Program after choosing the Programs tab in the left-hand menu.
7.) Consequently, After the program has fixed the application, shut down the program and launch QuickBooks once more.
8.) Lastly, Try to retrieve your company file’s backup and see if the problem has been fixed.

If the QuickBooks error 6123, 0 bothers you still, it means that the company file has been damaged and needs to be repaired. Follow the next troubleshooting solution for resolution.

Solution 3: Download and Run QuickBooks File Doctor to fix File Damage

Another troubleshooting step is downloading and running QuickBooks File Doctor. This usually fixes the file damage. Should you be able to access the company file now, it means the error has been resolved. In case you are getting the same error when you restore the company file from an external storage device, then you need to follow the next troubleshooting solution to fix this issue.

Also Read – How To Fix QuickBooks Script Error?

Solution 4: Restore the Backup from Local Storage

1. Firstly, go to the QuickBooks backup file folder situated inside the QuickBooks company file folder.
2. Secondly, Search for the file with the .qbb extension, which has the same name as your company file.
3. Subsequently, you need to copy the backup file to the computer’s local storage.
4. Thereafter, you need to open QuickBooks and then restore the company file, which was moved to the local storage.
5. Lastly, if the error still persists, then this could occur because the company file was restored on a new computer. Try following the next troubleshooting step to fix this particular error while you restore the company file on a new PC.

Solution 5: Restore the Backup using the Portable Company File

QuickBooks allows you to restore the company file on the same device where you created the backup file. This happens because of security reasons. If you attempt to restore the backup file on a device other than the one on which you created it, then you could get the QuickBooks Error 6123, 0. The way to get around this issue is that you create a portable company file instead of the regular backup file. You need to follow the below given instructions to resolve the issue;
1.) Firstly, open the QuickBooks where you had created the backup and then click on the File tab.
2.) Secondly, choose Create Copy option and then Create Portable Company file option.
3.) Thereafter, click on the Next option and then enter a name for the company file.
4.) Subsequently, choose the location where you want the company file saved and then click on Save and then OK.
5.) Consequently, shift the portable company file to the new computer where you want to restore the backup.
6.) Furthermore, open QuickBooks, go to click the file tab, Choose “Restore a Portable file,” and then hit the Next option.
7.) Now, look for the portable company file with the .qbm file extension and then click on Open.
8.) Thereafter, you need to carefully read the instructions provided on the “Where do you want to restore the file” page.
9.) Lastly, click on the Next and then Save option before you open the company file.

If you are still not able to access the company file, the actual reason could be the installation issues of the QuickBooks Desktop. You can fix such installation problems by first uninstalling all the traces of the current installation and then reinstalling a fresh copy of the QuickBooks Desktop application. One can run the QuickBooks Clean Install Tool to completely reinstall the QuickBooks Desktop.

Wrapping Up

Above, we have mentioned what exactly is the QuickBooks error 6123, 0, its causes, and its various troubleshooting solutions. Following these solutions, you can very easily resolve the issue. However, if none of these methods work for you, you might want to get some professional help. We have an in-house team of expert professionals who know the ins and outs of QuickBooks and can resolve your issues in moments.

Fix Sage 50 Decline Code 000006 Error 0008

Sage 50 decline code 000006 is a decline error in the program. This error occurs when a bank declines a transaction request from a customer; therefore, it is named the decline error. This error code depicts that the bank is not willing to process the transaction or the payment.

Sage 50 is one of the best accounting applications that is used by millions of users to streamline their business accounting processes. Moreover, you can add and manage your bank account with the program.

However, when making transactions, you may get this Sage 50 decline code 000006 error 0008 on your screen. There are several other decline codes as well, and each error code represents the payment declination, but the reasons are different.

Eventually, you may not be able to complete the transaction when these decline errors occur. In this post, we will discuss what causes this error code to crop up and how to fix Sage 50 decline code 000006.

Bank Errors In Sage

When using the banking feature in Sage 50, you may experience two types of errors. The first one is Gateway rejection, whereas the second error is Decline Error Codes. Decline errors occur when the transaction is declined by your financial institution due to multi-faceted reasons.

Gateway rejections depict that the transaction or verification request has not cleared certain rules created by a certain gateway. Some requests are rejected when you send the information to the processor. Besides, some are rejected after the transactions are authorized. It shows that the gateway will automatically void the transactions and restrict the payments.

Sage 50 decline code 000006 error 0008 is also a decline error in the program wherein your request for the transaction or payment is declined by your bank. It is possible that the transaction for the account is set up for retail rates. There are several other reasons as well that can cause this error to take place.

What Are The Possible Reasons Behind Sage 50 Decline Code 000006 Error 0008?

Improper shutdown of the system is one of the most apparent reasons behind the error. However, there are several other reasons that can give rise to the declination of the requested transaction from within the Sage 50 application. Check the below-given list:

  • Possible damage or corruption of the Windows system file.
  • Partial or damaged installation of the Sage 50 application can also evoke the error.
  • Improper or accidental deletion of the application or hardware can also bring forth Sage 50 Decline Code 000006 Error 0008 in the program.
  • Attacks from malicious viruses or malware can cause the error code to appear on your screen.

Now that you have seen the common reasons behind the arrival of the error, suppressing them one after the other can eliminate the persisting issue.

Also Read – How to Troubleshoot Sage 50 Error

How To Eliminate The Decline Code 000006 Error 0008 in Sage 50?

Knowing the possible reasons behind an error makes troubleshooting easier. The same goes for the payment declined error in the Sage 50 application. Below are some of the most effective solutions to eradicate the Sage 50 decline code:

Solution 1: Uninstall SQLCONNECTOR/ODBC 3.51.

In the first place, you need to go to the Control Panel and then uninstall the SQLCONNECTOR/ODBC 3.51. To do so, perform the below-given steps with full care and attention:

  • First things first, click on the Start button and then go to the Control Panel.
  • Next, navigate to the Programs and Features section.
  • Locate and right-click on My SQL CONNECTOR/ODBC 3.51. and select uninstall from the drop-down list.
  • Once done, restart Sage 50 and check if the error is resolved or not.

Solution 2: For Users Having Windows Vista or Higher

If you are using Windows Vista or Higher versions of Windows, you need to perform the below-given steps:

  • Perform the below-given series of actions to start and proceed with the solution:
  • Windows Start button>Control Panel>Network Sharing Center.
  • Here, you need to select the change adapter settings located on the top left hand.
  • Now go to the network connection and hit Properties.
  • Unmark the checkbox for Internet Protocol Version 6 (TCP/iPv6).
  • In the end, select OK and reboot the system.

If the Sage 50 decline code 000006 error 0008 still persists, try the next troubleshooting procedure.

Solution 3: For Windows XP Users

If you are a Windows XP user, then follow the below-explained steps:

  • In the first place, you need to select the Start button and then click on the Control Panel.
  • Thereafter, click on Network Connection to proceed further.
  • Now click on Properties.
  • Here, you need to uncheck the box against internet protocol versions (TCP/iPV6).
  • Once done, click OK to confirm and reboot the system.

Perform the same procedure in the program that was causing Sage 50 decline code 000006 – error 0008 and check if it is resolved or not.

Solution 4: Disable IPV6 In The Registry

If none of the solutions bring luck to the error resolution, try this solution with the utmost care and attention:

  • Go to the Windows Start menu and then type Regedit in the search area.
  • Hit Enter button after typing.
  • Again, select the Windows Start menu and then click on Run and write Regedit and select Ok.
  • Before you start this procedure, create a new backup file to keep your data intact.
  • Thereafter, click on Edit, New, and then click on the word (32-bit) Value.
  • Here, you need to hold on to disabled components.
  • Now Enter Off and reboot the system to make sure that the error is resolved.

Ending Words!

The solutions discussed in this post can help you eliminate the Sage 50 decline code 000006 error 0008. All you need is to perform the solution with your full attention. However, if you are facing trouble in performing the solutions, contact experienced Sage 50 professionals, and they will guide you from here in the error resolution. Once the error is resolved, you can get your bank transaction done without any problem.

Fix QuickBooks Error 6144 82 in 5 Easy Ways

QuickBooks error 6144 82 is one of the common 6000 series QuickBooks errors. This error mainly arises when an internal component of QuickBooks is damaged and is creating hindrance for user in accessing the company’s file.

Users will be able to notice this error with a pop-up display message as:

“QuickBooks has encountered a new problem and it needs to be closed. We are sorry for the inconvenience caused.”

Why Does QuickBooks Error Code 6144 82 Arise?

Once you become aware of why such an error occurs, prevention becomes easy. Below is the list of possible reasons of the QuickBooks error 6144 82;

  • A damaged or corrupted network data (.ND) or Transaction Log File (.TLG).
  • The current name of the QuickBooks file exceeds more than 65 characters.
  • When you suddenly shut down the PC.
  • Network and connectivity issues can also be a reason why the error surfaces.
  • When you have moved the QuickBooks file from the original folder location.
  • QuickBooks files are not downloaded properly on your PC.
  • A damaged or corrupted windows registry can also be a reason to the occurrence of the problem.
  • The background running antivirus software can disallow QuickBooks to access the company’s file.

These are the possible reasons, why the problem occurs. Now, let’s move forward towards the symptoms of the error.

Also Read: How can I locate a missing QuickBooks transaction

How to Identify QuickBooks Error 6144 82?

Before we jump to the solutions, let’s have a clear understanding of the symptoms through which you can identify the QuickBooks error code 6144 82.

  • PC’s windows is not responding or crashing frequently.
  • A pop-up display message appears on the screen displaying the error 6144 82.
  • PC is not responding to the commands provided by the mouse and keyboard.
  • When the PC suddenly faces a low-performance speed.
  • System is not responding to the commands provided by the mouse and keyboard.
  • QuickBooks desktop application is not working.

5 Ways to Resolve QuickBooks Error 6144 82

Let’s take a look at the tried and tested solutions you can follow to fix the QuickBooks error 6144 82.

Solution 1. Providing a New Short Name to QuickBooks Company’s File Name

If the current QuickBooks file name exceeds more than 65 characters, then it can cause many QuickBooks errors and error code 6144 82 is among one of them.

QuickBooks Company's File Name

In that scenario, you must provide a new short name to the file for resolving the error. Below are the steps you can follow to rename the QuickBooks company’s file name

  • Initially, navigate the windows file explorer by hitting the “Windows + E” keys together.
  • Now, navigate to the default QuickBooks file’s location, i.e., C:\ Users\ Public\ Public Documents\ Intuit\ QuickBooks\ Company Files.
  • After that, find the file ending with the extension as “.QBW.”
  • Now, right-click on the file and click on the “Rename” option.
  • Then provide a new name to the company’s file and ensure that the new name is less than 65 characters.
  • After providing the name, click on the “Save” option and close all the opened windows and tabs.

Once you have renamed the QuickBooks file, then open the QuickBooks desktop application again and examine if this method has helped you in resolving the error or not.

In case the error still exists, then try the next solution.

Solution 2. Rename the .ND and .TLG File

Rename the .ND and .TLG File

If the network data and transaction log files are damaged or corrupted, then the probability of facing errors while using the QuickBooks software is very high.

Here, renaming the files can help you to troubleshoot the problem. Given below are the steps that you can follow to rename the .ND and .TLG files.

  • First, open the folder where the QuickBooks company’s files are saved on your PC.
  • Here, you can search for the network data file by looking at the extension ending as “.ND.”
  • Now, right-click on the network data file and click on the “Rename” option.
  • After that, add “old” at the end of the extension name. With that effect, the name will be ending as “.ndold.”
  • Similarly, rename the extension of the Transaction Log file (TLG) to “.tlg.old.”

Now, launch the QuickBooks desktop application again and examine if this method has helped you in resolving the QuickBooks error code 6144 82 or not. If the error persists, then follow the third solution.

Solution 3. Move the QuickBooks Company’s File to Default Location

For moving the QuickBooks company’s file to the default location, here are the steps you can follow.

Move the QuickBooks Company's File

  • The first step is to open the QuickBooks product information window by pressing the F2 key on your keyboard.
  • Then launch the notepad on your PC and write the location where you have saved the QuickBooks company’s files.
  • Now, search for the file with the extension ending as “.QBW” and select it.
  • Next, copy the file by pressing the “Ctrl + C” keys and move it to the original QuickBooks folder.

After that, launch the QuickBooks desktop application and open the company’s file. If the file is still not opening, don’t panic and try the next solution.

Solution 4. Permit User Permissions to QuickBooks

If you have not allowed enough permissions for QuickBooks to work efficiently, then it might be a reason why the QuickBooks error 6144 82 arises.

Below are the steps you can follow to allow permissions to QuickBooks.

  • Firstly, on your server computer, run the QuickBooks desktop application.
  • Now, click on the “Company” tab option, followed by a click on the “Set Up Users and Roles” option.
  • Next, create a password for accessing the data file.
  • After that, under the list, click on the username option.
  • Thereon, you can now easily make the changes in settings as per requirements.

After allowing user permissions to QuickBooks, then check if the QuickBooks error code 6144 82 has been eliminated or not.

Also Read: Upgrade QuickBooks Desktop Pro Plus, Premier Plus, or Enterprise

Solution 5. Fix the Windows Registry

The last but not the least solution for resolving the QuickBooks error code 6144 82 is to repair the windows registry. Here are the steps that you can follow to repair the windows registry.

  • First, press the Windows key on your keyboard to navigate the windows start menu.
  • Next, type “Command” in the search box, but don’t press the enter button.
  • Thereon, press and hold the “Ctrl + Shift” keys together and then press the enter button.
  • After that, a permission dialog box will appear on your screen, followed by a click on the “Yes” option.
  • Now, a new black box with a blinking cursor will be open on your screen.
  • Thereon, type “Regedit” in the box and hit the enter button.
  • Moving ahead, under the registry window, select the error 6144 82.
  • After that, navigate to the “File” menu and click on the “Export” option.
  • Now, select the folder where you want to save the QuickBooks backup key.
  • Followed by the above steps, provide a name to the folder and click on the “Selected Branch” option, which is available under the “Export Range Box.”
    • Thereon, save all the updated changes you have made with the .reg file extension.
  • You have now successfully created the QuickBooks-related registry entry backup. After following all the solutions mentioned above, the QuickBooks error code 6144 82 will be resolved at this stage.
Ending Note

We hope you find this blog well. In this page, we have provided you with five different tried and tested solutions that you can easily follow to resolve the QuickBooks error code 6144 82. If you are still facing any issue while using the QuickBooks, then you can reach out to our experts through the chat box.

You can also send us your query through mail. Our professional QuickBooks experts are available 24*7 at the help desk to answer your query.

How To Fix QuickBooks Script Error?

QuickBooks script error are generally related to Internet Explorer. These errors generally arise when the user tries to open the company file in QuickBooks. Whenever the user tries to open to load a specific page, and if it fails to load properly, then it can lead to a QuickBooks script error.

Note: The line, char, and URL may vary in the error code message.

This error will never damage the company’s important data, but it can cause your device to run smoothly. If you are tired of facing QuickBooks script error, then in this blog, we will mention troubleshooting steps that you can follow to fix QuickBooks script error. So, read this entire blog till the end to avail complete information.

Also Read: QuickBooks not Responding

“If you need any guidance and help from experts in dealing with QuickBooks script error, then you can get in touch with our QuickBooks experts at+1 855 706 0905.”

Why Does QuickBooks Script Error Arises?

There are numerous reasons due to why the QuickBooks Script Error problem arises. Although we have tried our best to list some of the most common and possible reasons why the issue occurs;

  • The script debugging element is enabled on your PC.
  • Damaged or corrupted windows user can also lead to the script error in QuickBooks desktop.
  • If your PC is affected by malware threats, then it creates a hindrance in accessing company file.
  • When you are providing the account details which are already in use.
  • Previously made changes in your PC were not saved or checked.
  • Importing a bill or invoice from an account is different from accounts due or assets.

Also Read: Query Processing Error QuickBooks

How to Fix QuickBooks Script Error?

The underneath mentioned are the troubleshooting solutions that you can follow step-by-step to terminate QuickBooks script error;

Solution 1. Set Intuit as a Trusted Website in Internet Explorer

  • Launch the Internet Explorer web browser on your device, and navigate to the settings and Security tab option.
  • Thereon, navigate to the trusted sites section, and add “Intuit.com.”
  • Again navigate to the trusted site’s window, and un-check the “Require Server Verification (https:)” option.
  • Followed by the above steps, close the “Trusted Sites” window and unmark the “Enable Protected Mode” option.
  • At last, close “Internet Explorer” and open the QuickBooks desktop application again.

Now, verify if the QuickBooks script error has been terminated or not. In case the script error persists, then try the next solution.

Solution 2. Delete Cache & History Data Internet Explorer

The next solution you should implement is to delete the browser’s history and cache in the Internet Explorer web browser. Clearing the history will help you to run the QuickBooks desktop smoothly.

Given below are the steps that you can follow to clear the history and cache in the Internet Explorer web browser;

  • Firstly, navigate to the settings on the Internet Explorer browser.
  • After that, move toward the history section and checkmark all the boxes.
  • Thereon, click on the “Delete” option.
  • At last, click on the “Apply” and “OK” option.

Also Read: QuickBooks Migration Failed Unexpectedly

Solution 3. Use Internet Explorer in Compatibility View

  • On the Internet Explorer browser, click on the “Settings” tool icon available at the extreme left side of the screen.
  • As the settings drop-down list appears on the screen, click on the “Compatibility View Settings” option.
  • Now, the compatibility view window will be open on your device.
  • Moving ahead, you have to checkmark the box next to the “Display all websites in Compatibility View” option.
  • At last, click on the “Close” option to save the updated changes.

After launching the Internet Explorer in compatibility view mode, open the QuickBooks desktop and verify if the script error has been resolved.

Solution 4. Delete SSL Certificates

Let’s take a look at the steps that you can follow to delete SSL certificates in the Internet Explorer web browser;

  • Navigate to the Internet Explorer settings by clicking on the “Gear” icon.
  • The second step is to click on the “Internet Options.”
  • Move to the “Content” tab option, and then click on the “Clear SSL State” button.
  • Thereon, save the new changes by clicking on the “OK” option.

Also Read: QuickBooks Desktop 2023 Summary

Solution 5. Disable Add-ons

The add-ons in Internet Explorer can sometimes cause the browser to work slowly or may even lead to a crash. Therefore, it’s suggested to disable add-ons on the web browser so QuickBooks can easily connect with the online server.

Here are the steps that you can follow to turn off add-ons on the Internet Explorer web browser;

  • At first, move towards the “Tools” option in the Internet Explorer browser.
  • After that, click on “Internet Options” and select the “Programs” tab option.
  • Thereon, select the “Manage Add-ons” option, and then click on the “Disable” option available at the bottom side of the screen.
  • Moving ahead, click on the “Add-on” option, and select the “OK”> “Exit” option.

After performing the steps mentioned above, verify whether the QuickBooks script error has been terminated.

Also Read: Upgrade QuickBooks to QuickBooks Desktop 2023

Solution 6. Reset Internet Explorer Settings

If you mistakenly make any changes to the browser’s settings, it could lead to incompatibility and technical glitches, leading to script errors in QuickBooks.

Therefore, we suggest you reset the Internet Explorer settings on your device. Here are the steps that you can follow to set reset Internet Explorer settings to default;

  • Firstly, launch Internet Explorer, and click on the “Tools” option.
  • As the tools drop-down list appears on the screen, then select “Internet Options” and click on the “Advanced” tab.
  • At last, end this process by clicking on the “Reset” option.

Bottom Line

We hope the above solutions have helped you assist with the QuickBooks script error. In case the error continues to linger, then you can give us a call at +1 855 706 0905. Our QuickBooks experts are available 24/7 to help you in fixing the error. Place your call now to avail immediate help!

Also Read: Sage 50 Not Responding

8 Easy Solutions to Fix QuickBooks Error 80029c4a

QuickBooks being the number one accounting software, provides many unique features and advantages to small and medium-sized businesses. Although where QuickBooks has gained so much popularity by providing the best services, it still somehow, many users are facing errors while using the software. One of the common and most faced errors is QuickBooks error 80029c4a.

It’s quite normal to face any error in the accounting software. The question is, how to get this error fixed? In this blog post, we are going to provide you with a complete guide on how you can fix the QuickBooks error 80029c4a. So, stay tuned and read this informative blog till the last word.

What is QuickBooks Error 80089c4a?

The QuickBooks error 80089c4a is a run time error that generally arises when the user tries to open the QuickBooks company file. This error can also occur due to a damaged or corrupted company file, and there can be many reasons behind this error. Error code 80089c4a arises with a pop-up display message as:

Quickbooks Error 80029c4a (Error Message)

“An unexpected error code occurred while trying to access the company file.”

Also Read – How to Eliminate QuickBooks Won’t Open After Windows Update?

Why Does QuickBooks Error Code 80089c4a Arises?

Here is the list of the possible reasons why the QuickBooks error 80029c4a occurs.

  • The QuickBooks company file may be damaged or corrupted.
  • When the PC has been affected by the virus or malware software.
  • QuickBooks components or the DLL files are damaged or missing from the PC.
  • When the QuickBooks software has not been downloaded properly.
  • Using the outdated version of the software or the windows version.
  • The PC’s windows registry is damaged or corrupted.
  • Background running antivirus software is disabling the software to connect with the server.

How to Identify QuickBooks Error 80089c4a?

Let’s look at the symptoms through which you can easily identify the QuickBooks error code 80089c4a.

  • When your system is frequently hanging or freezing.
  • A Pop-up display message on the screen displays the error code.
  • When the system is not responding to the mouse and keyboard commands.
  • The application suddenly gets closed.

How to Fix QuickBooks Error 80089c4a?

You can easily follow these quick solutions to resolve the QuickBooks error code 80029c4a.

Solution 1. Restart your PC

Restart your PC

The first recommended and easiest solution to resolving any technical error or glitches is to restart the PC. Restarting the PC closes all the background running applications and processes, which can help you increase the device’s performance speed.

  • First of all, close all the background running applications on your device.
  • Press the “Alt + F4” keys to open the windows shut down command.
  • Then click on the drop-down arrow icon and select the “Restart” option.
  • At last, on the bottom right side of the screen, click on the “Restart” option.
Also Read – How Do I Upgrade QuickBooks Desktop Premier?

Solution 2. Download the Updates for QuickBooks desktop

Updates for QuickBooks desktop

Below are the steps you can follow to download the new updates for the QuickBooks desktop application.

  • To begin this process, first of all, open the QuickBooks desktop application.
  • Then, click on the “File” menu option available at the top left side of the screen.
  • Moving ahead, click on the “Close Company or Log Off” option under the drop-down list.
  • After that, select the file and click on the “Exit” option.
  • At this stage, ensure you have logged in to your system with admin rights.
  • Also, make sure that there is no company file on your PC.
  • Now, click on the “Help” menu option, followed by a click on the “Update QuickBooks” option.
  • Then, under the “Update QuickBooks” window, click on the “Options” heading.
  • After that, click on the “Mark All” option, followed by a click on the “Save” option.
  • Then switch to the update now settings.
  • Moving ahead, click on the “Reset Update” option, and subsequently, click on the “Get Updates” option.
  • Now, the updating process will be commenced on your screen.
  • Once the updating process ends, close all the background running windows and applications.
  • Thereon, restart your system and launch the QuickBooks desktop application.

After following the steps mentioned above, open the QuickBooks desktop and check if the error is still occurring or has been resolved.

Solution 3. Conduct the Windows Repair on PC

Windows Repair on PC

Below are the steps you can follow to repair the windows PC.

  • At first, exit the QuickBooks desktop application.
  • Now, open the windows start menu and click on the “Control Panel” option.
  • Under the control panel settings, click on the “Uninstall or Change” option.
  • Now, from the list of the applications, click on the “QuickBooksXX” option, where the XX stands for the year version you are currently using.
  • After that, click on the “Uninstall/ Change” program.
  • Then click on the “Next” option.
  • Select the “Repair Radio” option and click on the “Next” option.
  • Again tap on the “Repair” option, followed by a click on the “next” option.
  • Now, the repairing process will be commenced on your screen. Once the process ends, then click on the “Finish” option.

Once you are done with the above steps, restart your PC and launch the QuickBooks desktop application. Then, check if this method has helped you resolve the QuickBooks error 80029c4a or if it is still occurring.

Also Read – Easiest Solutions to Fix QuickBooks Error 15106

Solution 4. Run the QuickBooks Reboot.bat File

For using the QuickBooks reboot.bat file for resolving the QuickBooks error code 80029c4a, below are the steps you can follow to accomplish the process.

  • Firstly, close the QuickBooks desktop application.
  • Now, navigate and open the file which you want to reboot.
  • Then right, click on the QuickBooks desktop icon.
  • After that, click on the “Properties” option, followed by a click on the “Open File Location” open.
  • Moving ahead, right click on the “reboot.bat” file and select the “Run as Administrator” option.
  • Make sure not to close the window which opens manually. This window will be closed automatically once the reboot.bat utility is finished.

Following the above steps, restart your computer to complete this process. Once you are done with this process, then open the QuickBooks desktop application and check for the presence of the QuickBooks error. If the error still exists, move on to the next remedy.

Solution 5. Perform Windows System File Checker

Here are the steps you can easily perform to perform the windows system file checker on your PC.

  • Firstly, on your PC, go to the windows start menu by pressing the Windows key on your keyboard.
  • Thereon, type “Command” in the insert field.
  • After that, press and hold the “Ctrl + Shift” keys together and hit the enter key.
  • After that, a permission dialog box will be open on your screen, followed by a click on the “Yes” option.
  • Moving ahead, type “SCF/ Scannow” and press the enter button.
  • Then, the time system file checker will start scanning for the error code.

Also Read – Set Up Multi-User Network In QuickBooks

Solution 6. Update the Security Software to Latest Release

Update the Security Software

The next solution is to update the security software to the latest release. The steps that you can follow to update the security software are as follows.

  • First of all, download the new updates of the security software on your PC.
  • Thereon, add the Program/ Component Exceptions through them manually.
  • Lastly, open the QuickBooks desktop application again and check if the error has been resolved or not.

Once you are done with the steps, then make sure to follow the next solution as well.

Solution 7. Examine the Antivirus Settings

Sometimes the antivirus software can disable QuickBooks from running smoothly. If the below-mentioned programs appear in the quarantine, then you have to allow the permissions to these programs so that the QuickBooks can work properly.

Below mentioned is the list of the programs that you have to allow full permissions in the antivirus software.

  • QBW32.exe
  • QBDBMgrN.exe
  • QBGDSPlugin.exe
  • QBUpdate.exe
  • IntuitSyncManager.exe
  • OnlineBackup.exe
  • AutoBackupExe.exe
  • Dbmlsync.exe
  • DBManagerExe.exe
  • QBServerUtilityMgr.exe
  • QBCFMonitorService.exe
  • QBLaunch.exe
  • FileManagement.exe
  • FileMovementExe.exe
  • QuickBooksMessaging.exe

Also, ensure that these files are stored at > C:\ Program Files\ Intuit/ QuickBooks (year).

Also Read – QuickBooks Error Code 3371 Status Code 11118

Solution 8. Perform the Clean Install of QuickBooks Desktop Application

Perform the Clean Install of QuickBooks Desktop

If the QuickBooks error 80029c4a arises due to installation issues, clean installing the QuickBooks desktop application can help you resolve the error.

Below are the steps you can follow to clean install the QuickBooks.

  • Commence this process by noting all the important information about your QuickBooks product, i.e., license number, product key, and version.
  • Now, navigate to the control panel settings of your PC.
  • Then, under the control panel, click on the “Programs and Features” option.
  • The next step is to click on the “Programs” option.
  • Now, under the list of the available programs, click on the “QuickBooks Desktop” option.
  • Then click on the QuickBooks option and the Uninstall or change option.
  • Moving ahead, click on the “Remove” option.
  • At last, click on the “Next” option, and then the QuickBooks desktop will get uninstalled from your system.

Once you have installed the application, the next step is to install the application again.

  • First, check the system requirements for installing the QuickBooks desktop software.
  • Thereon, open the downloaded installation file with the .exe extension.
  • Moving ahead, double-click on the file to start the installation process.
  • Then, follow the on-screen instructions to complete the installation process of QuickBooks.
  • Then, provide your product’s license number and product key, and click on the “Next” option.
  • Following the above steps, select the recommended custom installation.
  • Once the completion process ends, then launch the QuickBooks software.
  • Moving ahead, click on the “File” menu option.
  • After that, click on the “Activate QuickBooks Desktop” under the drop-down list.
  • At last, follow the on-screen instructions to activate your QuickBooks version.

The Last Note

We hope you find this blog well. This blog post has covered all the information about the QuickBooks error code 80029c4a. Above, we have listed eight solutions you can easily follow to resolve the error. In case you face any problem while performing the steps mentioned above or have any other queries related to the topic, then you can reach out to us through the chat box.