Best Techniques to Resolve TurboTax Error 102345 Quickly 

Most often, the users might confront TurboTax Error 102345 while trying to open a TurboTax file in the Windows software. In that scenario, there might be the chance that you have opened a non-tax file in TurboTax. In other instances, this error may also appear due to the misconfiguration of the system files. As a result, this system file leads to the registry errors in your system.

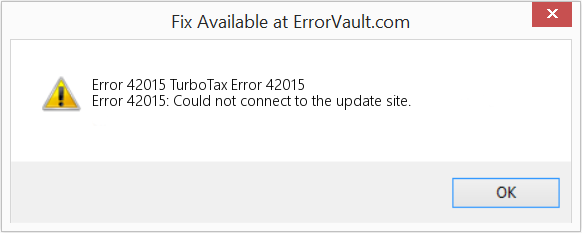
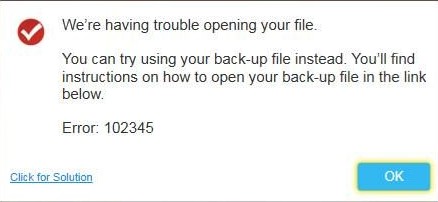
Usually, when the users strikes TurboTax Error 102345 or Error 1932147737 it started throwing the following error message:

TurboTax Error 102345

If you are also the one who is witnessing the error, then you must fix it as soon as possible. Considering this in mind, we have mentioned the best working solutions to fix this issue in this post.

Also Read: TurboTax Error 42016

Seeking for immediate help to figure out TurboTax Error 102345? Ring us at @ +1 855 706 0905 and contact to our experts to attain the best working solutions to overcome the issue

What are the Factors that Promote TurboTax Error 102345?

If you wish to get rid of the TurboTax Error Code 102345, you first have to understand the factors that might evoke the error. Therefore, to get a better knowledge about the root causes; let’s explore the points below.

  1. Making use of an outdated version of the TurboTax software.
  2. Sometimes, the corrupted files in TurboTax might also lead to TurboTax Error 102345.
  3. It may also occur when you try to install a new program on the old system.
  4. Issues related to spyware, adware and virus threats present in your system might be responsible.
  5. Errors in the Windows Registry are also one of the reasons that evoke Error 102345 in TurboTax.

Discussing How To Fix TurboTax Error 102345 Instantly.

Before proceeding towards the troubleshooting part, you must verify that your TurboTax software is upgraded to the newly launched version. To receive the confirmation look for the current status of the software.

1. Procedure: Get the New Updates Available for TurboTax

  1. In the initial stage, you have to open the TurboTax application on your device.
  2. Now, you have to sign in to the TurboTax account via correct login details.
  3. From the main menu, locate and tap on the Help tab.
  4. Go to the Online menu and ensure that the checkbox of “Check for Updates” option is marked.
  5. Later on, chose the OK option to confirm the changes made.
  6. Then, you must wait until the update process is over and click OK to relaunch the software.

2. Procedure: Repair the Error Using “Automatically Fix With RegCure Pro” Tool

  1. Initially, download and then install the RegCure Pro on your system.
  2. To move ahead, you have to wait until the installation process gets completed with upgraded settings.
  3. After this, tap on the Scan button and it will start detecting the error.
  4. Once the error is detected successfully, select the “Fix Errors” option. Then, you have to proceed further by applying all the instructions displayed on the screen.
  5. As a result, it will automatically identify and fix the issue within a couple of moments.
  6. Finally, relaunch your Windows PC and verify whether the issue is resolved.

Also Read: TurboTax Error 190

3. Procedure: Optimization of Your PC through PlumBytes

  1. To begin with, the users first have to get the Plumbytes on their system using the preferred web browser.
  2. Then, move further by applying the instructions visible on the screen.
  3. After this, open the Plumbytes application by double- clicking on it.
  4. Once the application is released successfully, tap on the Scan option.
  5. Finally, choose the All Threats option and then hit the Remove Now button to resolve all threats from your system.

Alternative Way to Resolve TurboTax Error 102345

Even after implementing the above listed resolution methods you cannot fix TurboTax Error 102345, then don’t panic. Instead, follow the troubleshooting method listed below.

Solution: Try Uninstalling and Reinstalling TurboTax

Sometimes by reinstalling the TurboTax software would help the users in resolving TurboTax Error Code 102345. For that, perform the steps in the same manner as written below to avoid further discrepancy.

Actions to be performed to Uninstall TurboTax

  1. Begin the process by launching the Windows taskbar on your device and then enter “Uninstall” in the search column.
  2. Following this, choose the Add or Remove program option followed by the Apps and Features option.
  3. As a result, it will start showing a list of all the applications and programs installed on your device.
  4. Then, you need to scroll down to the list and locate the TurboTax option from the list.
  5. Now, right-click on the TurboTax icon and hit the Uninstall option. By doing so, it will remove the application permanently from your device.
  6. Finally, relaunch your Windows PC to erase the cached files and folders from your device permanently.

Steps to be done to Reinstall the TurboTax software

  1. To begin with, open your preferred web browser to visit the official website of TurboTax.
  2. After this, you have to download the newly launched version of TurboTax using the downloading page.
  3. Once the downloading is over, move to the download folder and then launch the installer file.
  4. Hit the Next button to continue further and then from the window of Ready to Install choose the Install option.
  5. Now, you have to wind up the installation procedure by going through the instructions displayed on-screen. Further, choose the Launch TurboTax option and move to the next step.
  6. Ultimately, you have to add the License key in the required text field to register your TurboTax account.
  7. Finally, relaunch your system and then verify if the error still persists.

The Final Say!!

Hopefully, we hope that you might find this post informative and worth-reading and assist you in fixing TurboTax Error 102345. However, to avoid this error in future, always keep your TurboTax software updated as per the newly launched version. For any additional information, feel free to communicate with our professionals via live chat facility. Once you get in touch with our experts they will try their best in assisting you in the best possible way asap.

Simple Hacks to Resolve Query Processing Error QuickBooks

QuickBooks is one of the most used and favored accounting software introduced by Intuit. It is a vast accounting software platform that has the best services for you. However, sometimes the users may face an unwanted error while completing their task on the software; one such error is Query Processing Error QuickBooks. It takes place when you are using the software’s online or Desktop version, that too for creating invoices for something.

You can easily fix this query processing errors in QuickBooks by knowing its possible reasons and effective troubleshooting methods. However, if you get stuck in the process, you can simply call us at +1 855 706 0905 and ask for help from our QuickBooks experts.

Also Read: How to Move QuickBooks to Another Computer

What are Query Processing Error QuickBooks?

Query Processing Error in QuickBooks is an unexpected error in QuickBooks accounting software that occurs due to the browsing error and creates hindrance while performing a few ongoing important functions.

Note: If you are in search of a Quick fix for this error, then you can try to use QuickBooks in incognito mode.

Reasons Behind the Query Processing QuickBooks Error.

Before going further with the troubleshoots, let’s first understand the reasons why QuickBooks Query processing error happens. So, the list of causes are:

1. Poor Internet Speed

If your Internet speed is slow, it can create major issues for you, causing the error.

2. Incorrect Security Settings

The error can also occur due to inappropriate security settings.

3. Older version of QuickBooks

If you are using an outdated or older version of QuickBooks, the Query Processing Error in QuickBooks may take place.

4. Damaged Company File

And one major reason is damaged company files, which creates the QuickBooks Query Processing Error.

How to Fix Query Processing Errors in QuickBooks?

 If you want to resolve Query Processing error QuickBooks, then follow the given Methods discussed in this blog.

Method 1: Update QuickBooks To the Latest Version

Whenever you are facing an error in the QuickBooks app, it is always advised to update the software because every time QuickBooks comes with an update, they try to overcome all the previous errors the software had.
So to use a more efficient and error-free version of QuickBooks, update it by following these steps:

  • Initially, Launch the QuickBooks desktop application.
  • Then to go further, hit the Help icon or key.
  • After that, hit the QuickBooks version.
  • Now move toward the Update QuickBooks window, followed by a hit on the Update button.
  • Now choose the latest version of QuickBooks.
  • Then, Hit the Update option, and once the update is done, close the desktop to finalize the process.

Method 2: Switch Off the User Account Control

If you encounter a QuickBooks Query Processing error, then, to fix it, try to turn off the UAC and check if your error is resolved.

Follow the given process to switch off the User Account Control.

  • To initiate the process, close all the software that are running on your System.
  • Then go to the Control Panel window on your device.
  • Next, you have to click on the Search field and enter the User Account in the search box.
  • After that hit on the Change User Account Control option and then hit the Yes option present in that window.
  • Now, going further, choose the option Never Notify to stop getting notifications.
  • Now hit on OK and reboot your System.

Here you are done with the process of switching off The UAC, now open the QuickBooks Software and check if you are able to access it without facing a QuickBooks Query Processing error.

Method 3 : Stop QuickBooks at the time of Startup

To fix the Query Processing Error in QuickBooks, follow these steps:

  • To begin the process, Hold and press the Alt key.
  • Now you have to double-click on the QuickBooks icon.
  • After that, Write down your QuickBooks password in the required field.
  • Thereafter, enter all the asked informatics in the required field.
  • Now, release the Alt key and hit on the Ok option.
  • Now again, press and hold the Alt key on your keyboard while launching the menu.

 Once you are done signing into your QuickBooks account, release the Alt Key.

Method 4 : Run a Sample file in QuickBooks

If you are facing a Query Processing error in your QuickBooks account, then we will recommend you open a sample file in QuickBooks to troubleshoot the error and to do so:

  • Firstly, find the QuickBooks icon on your desktop, press and hold the CTRL key, then Double click on the QuickBooks icon.
  • You have to hold the control key until the No Company Open window appears on your window.
  • Now, hit on the No Company Open heading, and select one of the sample files, then click on it to go further.
  • Once you are done with the process, check if the error is fixed.

Access your Company file from some other location

If you tried to log in to your Company file from some different location and failed then, then maybe the error is in the Folder that has the QuickBooks file. (The Folder is damaged)

Note: If the issue is not in the Folder, then the company file is damaged. 

So to know about it, follow the given steps:

  • Create a new folder in your System, and name it QBTEST.
  • Then, go to the Folder that has the QuickBooks Company File, and search the File with the help of the QBW extension.
  • After that, hit on the File to highlight it.
  • Once you are done highlighting your File, Copy the File by pressing CTRL +C.
  • Now open the new Folder on your System, and paste the copied company file using the CTRL+V key.
  • After that, open QuickBooks and press and hold the CTRL key.
  • Now, hit open and browse your Company File from the new Folder (location).

Note: Release the key if the “No Company Open” appears on your screen.

 After this, open the company file, and check if your QuickBooks query processing error is resolved.

 If the problem is not in the Folder, then chances are that your File is damaged. To know more about it, go through the next method.

Recreate the QuickBooks Company File

If, even after following all these procedures, the Query processing error in your QuickBooks account is consistent, then to resolve it, recreate the QuickBooks Company File.

Note: It is helpful if your Company file is damaged.

Try the given steps and recreate the company file.

  • Click on the Company menu.
  • Then, to move forward, hit the Users option.
  • Now, you have to choose the Set Up User & Roles.
  • Search for the user files that have an error, then delete them.
  • Now, go to the Account menu option and hit on New to create a new user file.
  • Provide all the correct login details in the required box, like your Username & Password.
  • Then, set up the Roles for the user.
  • And to finish the process, hit the OK button to create a new user.

Conclusion

At this point, we have come to an end and hope that the methods discussed above will help you to fix your Query Processing QuickBooks error. However, to avoid the error, always try to update your QuickBooks software asap. If you still encounter any issues, connect with our experts through live chat or email; we are available 24*7. Our experts will consult you in no time and assist you in the best possible manner.

A Quick Overview on How to Move QuickBooks to Another Computer

Are you finding the process to move QuickBooks to another computer a bit complicated and hectic? If that’s so then this place is right for you. In this comprehensive guide we have discussed how you can use the QuickBooks Migrator tool to move QuickBooks to another device.

Moreover, we have also discussed the prerequisites required before you transfer QuickBooks to another device. We suggest you read this article till the end completely and accomplish the transfer process easily.

Wondering how to move QuickBooks to another computer and need instant help? Dial @ +1 855 706 0905 and communicate with our experts to obtain the best possible assistance. 

Discussing the Working of QuickBooks Migrator Tool

The QuickBooks Migrator Tool is also known as the Move QuickBooks tool. In order to utilize this tool, it is essential that you must have proper admin rights. Moreover, it is also necessary to generate a difficult password

This tool will allow you to transfer a maximum of three company files in the USB drive along with the supporting documents. Moreover the QuickBooks Migrator Tool would also download the correct version of QBDT on your new PC.

Essentials Required Before You Move QuickBooks to Another Computer

Before transferring QuickBooks to another computer, it is essential to consider the following things in your mind. Read the following points attentively.

  • The first and foremost thing is that you must have a License key and a Product Registration key.
  • Verify that the system on which you wish to transfer the QuickBooks is connected with a good internet connection.
  • You must have an external storage device like a flash drive, a USB storage device, etc to transfer QB to another system.
  • Always, ensure that you have completely uninstalled the QuickBooks from your old system.
  • Don’t forget to have a backup of your QuickBooks company file so that you can safeguard your company records.

Things that you can Copy when you Move QuickBooks To Another computer

The users must know that they can’t transfer all the data while transferring a QuickBooks data file to another computer. You don’t have to delete the old data unless you are sure that all the data from old data is being transferred.

  • Financial Statement Designer
  • Local Attachments
  • Cash Flow statements
  • Memorized Reports
  • Financial Statement Designer (FSD clients)
  • Printer Settings
  • QuickBooks Loan Manager (.Imr)
  • Advanced Reports (for QB Enterprise
  • QuickBooks Templates and letters
  • Version and other QBDT details.
  • Also, you can send up to the latest three company files with the supporting documents.
  • Statement Writer
  • Spell Checker (spell.ini and UserDictionary.tlx)
  • Financial Statement Designer (FSD data)
  • Business Planner (.bpw)
  • You may also transfer all other related files along with custom templates and forms.

Things you can’t Transfer while Moving QuickBooks to another Device

There are certain things which the users fail to transfer from QuickBooks data file while transferring to a new computer. Read the below listed point below.

  1. The backup of the data file that you have created manually can’t be transferred.
  2. You cannot use the QuickBooks Payroll services set up in an old computer. To use those payment services you have to sign in again into your new PC to access the payroll services effortlessly.
  3. The QuickBooks company files that you have opened previously won’t be transferred. You can only transfer the previously opened three company files. However, if you want to transfer any other file, you can either move it manually or restore via Intuit Data Protect.
  4. Also, you have to remove the Intuit Data Protect from the old computer and then install it again on your New PC.
  5. For instance, if you are utilizing QuickBooks Desktop in the multi-user setup. In that case, you won’t be able to copy the configuration to the new computer.

Learn how to move QuickBooks to Another Device using Migrator Tool

Here, we have listed some of the simple steps using which you can easily transfer QuickBooks to another device. Apply the steps as listed below without missing any step to avoid any discrepancy.

Apply the Steps on Old PC

  • Before proceeding further, ensure that you have login to your computer with correct login credentials.
  • After this, you have to insert the USB Drive into your computer and access the QuickBooks Desktop.
  • From there, look below the File tab and choose the Move QuickBooks to another computer option.
  • Then, you must go further by clicking on the “I’m Ready” option and pick a strong password for your account.
  • You then have to pick the USB Drive in which you can transfer all the files that need to be transferred to another device.
  • Now, you have to wait for a while until the file copy process gets completed. Once the process is over, safely take out the USB Drive from your system.

Actions to be Performed on New PC

  • Firstly, you have to input the USB Drive and then wait until you see the QuickBooks Migrator Tool on your system. If the tool isn’t visible then select the “Move_QuickBooks.bat” file from the USB Drive.
  • After this, add the password that you have created while moving files on the old computer.
  • Now, tap on the Let’s Go option and then you must wait until the tool completes the migration task.
  • The time taken by the tool to run totally depends on the size of the QuickBooks company file that you wish to transfer.
  • Once the installation is over, launch the QuickBooks Desktop and then choose the Register QuickBooks option.
  • Then, move further by adding the important details for registration like phone number, postal code and license key.

Also Read: QuickBooks Migration Failed

Steps to Perform to Move QuickBooks to another device manually

You can also transfer QuickBooks to another device manually. The manual process to move the QuickBooks data is a straightforward process. In this process, all you have to do is to uninstall the QBDT and reinstall it. For that, go through the instructions listed below attentively.

  1. First of all, you must ensure that you have the Product Key and License Number of the QBDT version you are using presently.
  2. Then, from your old system you have to remove the QuickBooks Desktop entirely.
  3. Once you have uninstalled the software, install the application once again on the new computer.
  4. After reading the Terms and Conditions as listed on the License Agreement. Then, you have to insert the License key and Product key within the required text field.
  5. Following this, you have to get your QuickBooks Desktop installed on your system.

Once you have completed the task, the QuickBooks Migrator Tool removes your QuickBooks company files from your external storage device. Moreover, you will find that the QuickBooks company file will still be present on your old PC.

What should you do after moving QuickBooks to the other computer?

  1. For instance, if you want to utilize all the features of QuickBooks Desktop such as Payroll and Intuit Data Protect. In that scenario, you are required to log in to each device separately.
  2. If you are using multiple company files, then you have to copy the other company file to a new device using an external storage device.
  3. Always, ensure that you have generated the backup of the company file data on your system.

The Final Thoughts!!

With the help of this post, we hope that you can now easily move QuickBooks to another computer. However, if you are still facing any difficulty while transferring the QuickBooks data then contact our experts through live chat. Our team is available 24*7 to provide you with the required assistance in the best possible manner.

How to Resolve TurboTax Error 42016 with Easy Steps

When we discuss tax preparation software, TurboTax comes at the top of the list; it is one of the best software used by people in the USA. The software gives you the freedom to e-filing your tax return from anywhere. Its features are enhanced day by day with new and latest designs, bug-free user interface, etc. However, sometimes the users may face errors while using the software, like Error 42016.

This error can create issues for you by decreasing your device’s speed, or you may lose files from your device as well. Thus, it is always advised to resolve this error as soon as possible. To Fix TurboTax Error 42016, you can follow this blog and find easy methods to troubleshoot it.

Also Read: TurboTax Error 42015

What is TurboTax Error code 42016?

TurboTax error 42016 happens in our device when the TurboTax software crashes or fails at the time of running. It is a run-time error. The error doesn’t mean that your code was corrupted in any way; however, it may stop working at its run time.

The error 42016 TurboTax will appear on your screen until it is corrected properly.
Now, let’s try to understand more about it by reading about its symptoms, causes, and solutions.

Symptoms of TurboTax Error 42016

When Error TurboTax 42016 takes place on your website, there will be no warning, as it is a run-time error. The error message will appear on your screen anytime while using the software, and it can be a repetitive thing.

The main symptoms of error 42016 are mentioned below:

  • Your system crashes while you are using the software.
  • The device responds slowly now.
  • Your system starts freezing on its own.
  • And your TurboTax software gets shut down by itself without any previous warning.

Causes of TurboTax Error 42016

There can be various reasons behind TurboTax error 42016 in your system. Its causes are almost similar to TurboTax error 2318 & error 42015, and if not designed and tested in a proper way, these errors can take place during run-time in your system.

The causes of TurboTax error 42016 are mentioned below; you can go through it and check if any of them matches your device.

  • TurboTax software is not installed properly, or even if it is downloaded, the file is corrupted.
  • The space in your device is not sufficient, or a bad graphics driver can also create major issues.
  • The presence of viruses in your system.
  • At times, you face this error, also because of a Poor Internet connection.

The error must be identified and resolved as soon as possible, and follow the given troubleshoots to get a rapid solution.

How to Fix TurboTax Error 42016?

To fix TurboTax Error 42016, you can follow these methods:

1.Shut Down all the Conflicting Programs

Suppose you receive a run-time error; then the first thing you need to do is close all the conflicting programs available on your device. And to do so, you can follow the given steps:

1. Open the task manager by pressing Ctrl+Alt+Del, at the same time. This will show you the list of all the running programs.
2. Now, you have to reach the Processes tab and stop all the other programs that are running.
3. Select each program one by one and then hit the End Process button.
4. Then you have to check for any kind of error message reoccurrence whenever you stop a process.

By following this, you will find the program that is creating the error, then go to the next step and reinstall the application now.

2. Update the latest version of the Virus Protection Program or Update your Window.

The presence of an infected virus can also create errors like 42016 TurboTax; these run-time errors can be removed by scanning your device completely. Thus update your virus protection program frequently to eliminate these errors.

At times users also face this issue due to the presence of an older version of the software in their device, so you have to do a regular check if a new windows update is available and update your system for better functioning of the software and your system.

3. Uninstall & Install the Run-Time Libraries Again.

TurboTax Error code 42016 can also occur in your device due to incomplete installation of some specific package. If you are facing the error, it is always advised to uninstall the current package that your system has and try to go for the installation again. To do so:

1. Open Program & features
2. Then look for your package there
3. Then uninstall it and reboot your system.
4. Now, for reinstallation, download and install the latest redistributable package.

4. Check your Graphic Driver and Reinstall it.

Suppose the error you are facing is due to your graphic card; then you can follow these steps to reinstall it:

1. Initially, go to your Device Manager and look for a graphics driver.
2. Then, you have to right-click on the video card driver and hit the uninstall option.
3. Now, you have to reboot your system and install the graphics driver again.

5. Error due to Internet Explorer

Initially verify if the error you are facing is due to internet explorer, then follow these steps to eliminate it:

  1. Reset your Web Browser
  2. If you are a Windows 7 user, then
  • Hit the Start option
  • Then reach the Control Panel.
  • Now hit the Internet Options present on the left-hand side of your screen.
  • After that, hit on the ‘Advanced’ tab, and at last, hit the Reset Options.
  1.  If you are a windows 8 & 10 user, then,
  2. Hit on Search, then enter Internet Options.
  3. Now, go to the ‘Advanced’ tab, and hit the reset button.
  4. Now open the Advanced tab, and look for the Disable script debugging option.
  5. Then, Check mark that option.
  6. After that, un-check the “Display a Notification about every Script Error” option at that time.
  7. At last, hit the apply and OK to restart your system.

Steps to Fix TurboTax Error 42016 on Windows 10

If you are facing TurboTax Error 42016 on your Windows 10, then follow these steps:

  1. Initially, go to the start menu and then reach the Programs and Features options.
  2. Then look for the software that is connected to “Insert File Name.”
  3. Now, select Change/Uninstall.
  4. After that, in front of you, a pop-up will appear with the uninstallation option; hit the Okay option there, followed by the Next.
  5. At last, reboot your system and install the software again.

Note 1: To fix the error code 42016 TurboTax on android or iPhone, look for the latest update of your OS; if available, then update your device to the latest version; after that, uninstall the TurboTax software and reinstall it again.

This will help you in working smoothly on TurboTax software without any errors.

Final Words!

These are a few steps you can follow to eliminate TurboTax error 42016 for various operating systems. However, if your problem is still not resolved, you can contact our TurboTax experts at +1 855 706 0905 Feel free to get in touch as we are available 24*7 to offer you our help.

Frequently Asked Questions

Q1. Can I fix a TurboTax Error 42016?

A. If you have ever used TurboTax Online, then log in to your TurboTax account there and choose the “Amend a return that was filed and accepted.” option, and if you are a user of TurboTax CD/download product, then sign in to your account return and choose “Amend a filed return.”
Note: You should file a different Form (1040-X)for every tax return you are modifying.

Q2. Why is my TurboTax service code not working?

A. If you have provided an incorrect license code, it will not work properly to activate the TurboTax software.
Thus, check your license code twice before submitting.
Important: License codes are not case-sensitive.

Q3. How to fix TurboTax Error Code 42016 on my windows?

A. To fix and eliminate the TurboTax error 42016 on your Windows
1. Install the latest version of windows.
2. Verify your Internet Speed.
3. Retry to update your system by hitting the Check for the updates option in the Online menu in TurboTax.

Note: If you failed to update it, then retry or go with the manual process to update.

Q4. Why am I facing the TurboTax 42016 error?

A. There can be different causes behind your facing TurboTax error 42016, like:

• TurboTax setup file is not properly downloaded in your system.
• Infected viruses are available in your system.
• Your device has insufficient memory or a poor graphic driver.
• Your network Connection is Poor.

Proven Ways to Deal With TurboTax Error 42015 Easily 

In certain instances, the users might confront TurboTax Error 42015 due to the misconfiguration of the proxy server settings. When the error occurs, it obstructs the users from connecting to the server, and thus, it might interrupt the users to access TurboTax.

Everytime, the users receive Error 42015 on TurboTax, they will get the following error message on their screen stating:

TurboTax Error 42015

Moreover, the error might appear while using an unsupported version of the TurboTax software. However, there are multiple other reasons that might lead to TurboTax Error 42015. So, to inform you regarding all of them, we have listed all the possible reasons below. Also, you will get to know the easy ways to overcome the issue immediately in this post.

Also Read: TurboTax Error 190

Don’t have enough time to fix TurboTax Error 42015 on your own? Call @ +1 855 706 0905, and our experts will resolve your error within no time. 

Factors Leading to the Occurrence of Error Code 42015 TurboTax

Before proceeding further to the troubleshooting part, it is essential to know the main cause of the issue. To update you on all of them, we have listed some factors that might lead to TurboTax Error Code 42015.

  1. The users might end up with Error 42015 on TurboTax due to an interruption in software installation.
  2. Improper program setup or corrupt download of TurboTax may also be responsible.
  3. Sometimes, it may occur when another program removes the crucial TurboTax-related files mistakenly.
  4. Corruption in the Windows Registry may be one of the reasons that result in this error.

How can you Determine TurboTax Error 42015?

The users can easily identify TurboTax Error 42015 with the help of the following identifications; which are as follows:

  1. Whenever the error occurs, the error message on your screen starts flashing.
  2. The users may notice the sluggish performance of their system.
  3. Sometimes, it may happen when the Windows starts responding slowly.
  4. Everytime the error strikes, an active window begins to crash or freeze.
  5. It might stop you from reaching the update server.

Simple Ways to Get Rid Of TurboTax Error 42015

You might find TurboTax Error 42015 easier to resolve if you find the appropriate solutions to deal with the issue. Therefore, to make it simpler, we have stated some of the easy ways to tackle the error below.

Way 1: Temporarily Disable the Proxy Server

The proxy server acts as an intermediary between your system and the internet network connection. Generally, accessing the proxy server is great, but it might create issues when multiple programs are already running on it. As a result, it might end up with TurboTax Error 42015. Therefore, to avoid such an issue, you must turn the Proxy Server off by following the instructions below.

Disable using the Internet Explorer

  1. The first step is to start Internet Explorer on your device.
  2. After this, select the Gear icon, followed by the Options tab.
  3. Proceed further by tapping the Connections tab and then accessing your LAN Settings.
  4. Then, ensure that you have marked the “Use a proxy server for your LAN” checkbox.
  5. Finally, save the mandatory changes and try to receive the latest updates on your Windows device.

Disable using the Control Panel 

  1. Click on the Windows menu and then input “Control Panel” in the search column. Then, hit the enter key to move ahead.
  2. From the upcoming window, opt for the Network and Internet Connections option.
  3. After this, you are supposed to tap on the Connections tab followed by the LAN Settings.
  4. You must verify that you have kept the checkbox of “Use proxy server settings” unmarked.
  5. Ultimately, restore the mandatory modifications and then try upgrading your PC.

Way 2: Put an End to the Conflicting Programs

  • To stop the conflicting programs, you must open your device’s task Manager. For this, you need to press the Ctrl + Alt + Del keys simultaneously.
  • After this, locate and click on the Processes tab. Then, you must stop the running applications one by one after highlighting them.
  • You are supposed to right-click on the TurboTax program and then choose the End Task option.
  • Next, you must look at whether you still encounter the same error on your screen.
  • Finding that that is generating the error, you must try another resolution method to resolve the issue.

Way 3: Downloading the Latest TurboTax Update

Sometimes, the users might encounter TurboTax Error 42016 due to outdated software. Therefore, to avoid such issues, installing the upgraded version of the software is mandatory. For that, you need to implement the steps as prescribed below.

  1. Before proceeding further, verify that you have shut down all the applications and TurboTax running in the background.
  2. Then, you have to get the manual update of the application downloaded through the link. Further, get the updates downloaded by following the instructions on the screen.
  3. After completing the downloading process, you must save your file on the PC and initiate the updating process.
  4. Go through the instructions listed on the screen to complete the manual update process.

Way 4: Installation of the RunTime Libraries Once Again

  • In the beginning, you have to uninstall the TurboTax application through the Programs and Features option.
  • Soon after this, you have to search for the Microsoft Visual C++ Redistribution package from the list of programs installed.
  • Furthermore, right-click on the Microsoft Visual C++ Redistribution Package and then pick the Uninstall option.
  • After the process of uninstallation is completed, start your system once again.
  • Finally, you need to get the upgraded Redistributable package from Microsoft and reinstall it.

Way 5: Execute Disk Cleanup

Generally, the users might face difficulty installing the TurboTax because of the disk storage space. Therefore, it is essential to run the disk cleanup to remove unnecessary space on your hard disk. Eventually, this will improve the performance of your system.

To do the disk cleanup on your disk, you must try performing the steps instructed below.

  1. To begin with, you have to establish a backup of your tax-related files.
  2. Soon after this, erase the files that are not in use from your PC and then relaunch them.
  3. Now, run the Disk Cleanup, access the Explorer window, and then Directory.
  4. End the process by selecting the Properties option. Later on, you have to opt for the Disk Cleanup option.

Way 6: Remove and Install Graphic Drivers once again

  • The first and foremost step is to launch the Device Manager and then find the graphic driver.
  • After that, right-click on the option of Video Card Driver and then tap on the Uninstall option.
  • Thereafter, launch your system again and install your graphic driver again.

Way 7: Try Fixing the Internet-Related Issues

If you aren’t aware of how to deal with internet-related issues, apply the steps below.

Reset your Web Browser

  • The users accessing the Windows 7 operating systems have to tap on the Start menu and then open the Control Panel.
  • After that, click on the Internet Options, Advanced tab, and then on the Reset button.
  • On the other hand, the users accessing Windows 8 and 10 have to tap on the Search option and then Internet Options.
  • Finally, choose the Advanced tab and then tap on the Reset option.

Turn Off Script Debugging and Error Notifications

  • To begin with, click on the Advanced tab from the Internet Options window. Then, you have to search for Disable Script Debugging.
  • You must verify that you have selected the checkbox beside the “Radio” button.
  • Now, check that you have kept the checkbox of “Display a Notification about every Script Error” item unmarked. Further, tap on the Apply option followed by Ok.
  • Finally, you must relaunch your PC to verify if the error persists.

Closure

So, here we have arrived at the end of this post and hope that you have got a clear vision to deal with TurboTax Error 42015. However, if you require any additional assistance, feel free to contact our experts. You can attain instant help from our experts through email or live chat.

A Detailed Guide on How to Install TurboTax on Mac

Are you getting an issue while install TurboTax on Mac? This comprehensive post is the right place that covers all the simple steps to do the same. TurboTax is the most preferred tax filing and preparation software that makes the tax computation and filing process much easier.

Moreover, the TurboTax software is compatible with Mac devices also. After completing the installation process of the application, you can file state or federal taxes easily. For further details regarding installing TurboTax on Mac, stay tuned to this post until the end.

Facing difficulty while installing TurboTax on Mac and need instant help? Dial @ +1 855 706 0905 and talk to our experts to clarify all your doubts within no time.

Points You Must Consider Before Installing TurboTax On Mac

The users must consider the following points in mind before they move towards the installation of TurboTax on Mac.

  1. You must ensure that you are using a stable and good internet connection.
  2. Before installing the TurboTax on a Mac device, you must verify whether your system is compatible to run the software.
  3. Avoid switching to any other window until the installation process gets completed to avoid further discrepancies.
  4. You must have a License Code handy to install the TurboTax software on your device easily.

How can you Find TurboTax for Mac Software Download?

If you have recently downloaded TurboTax on your Mac software, search for the icon on your desktop. Alternatively, you can also look for your downloaded setup file by the file name, which is as follows:

  • For TurboTax Basic, Deluxe, Premier, and Home Business Edition, you must look for the “m_turbotax”.
  • TurboTax State program users must look for the “m_[state]” and then change the [state] with the state’s name.

Here’s how to install TurboTax on Mac with CD Drive

Follow the stepwise instructions listed below to complete the installation of TurboTax on Mac devices.

  1. Firstly, you must insert the CD Drive into your Mac’s CD/DVD. Alternatively, you can tap on the “.dmg” file of TurboTax twice to open the downloaded setup file on your system.
  2. Go through the instructions in the pop-up window to drag the TurboTax check icon to the “Applications” folder.

Note: Dragging the TurboTax to the Application folder is not required as it is already on your Mac device. Instead, you must move it to the Application folder in the pop-up window.

3. Once you reach the “Your product is installed, now let’s activate it” screen, you must add the license code. Eventually, hit the Continue option to complete the installation procedure of TurboTax on Mac.

Note: License Code consists of a 16-character combination of letters and numbers. You might get this code either on the CD box envelope or packaging slip. Otherwise, you might acquire the code in the Order Confirmation Email or your Order History.

Here’s How to Install TurboTax on Mac without a CD drive

If you have purchased the TurboTax software online and don’t have a CD to install the software. In that scenario, you must follow the procedure discussed below to install the software on your system.

For that, you have to visit the official website of TurboTax and then download the most recent version of the software. Then, install the software by performing the following steps:

  1. Before starting the process, make sure you have shut down all open applications on your system.
  2. Moreover, you also have to disable the Mac security software. This is so that you can seamlessly install the software on the Mac system.
  3. After this, reach the official website of TurboTax using your preferred web browser.
  4. You are supposed to pick the correct TurboTax edition from the available list of options.
  5. Once you have chosen your TurboTax edition, tap on the Download button to install the software on your device.
  6. In the end, to install the TurboTax on your Mac device without CD or DVD Drive, access the downloaded file. Then, you can open the TurboTax Setup file easily on your system.

Also Read: How to Change Email on TurboTax

Stepwise Instructions to Install TurboTax on MacBook Pro

  1. In the first step, carefully put the installation CD within your MacBook Pro optical drive.
  2. Soon after this, you have to wait for some time until the installation of the CD automatically reads.
  3. You can also do the TurboTax setup by launching the application files on the TurboTax CD.
  4. Thereafter, go through the on-screen prompts closely to accomplish the installation of TurboTax on Mac devices.
  5. Once the process is over, tap on Finish and relaunch your system.
  6. Finally, you can now begin submitting your taxes according to your convenience by accessing the TurboTax application.

What should you do when TurboTax is not Installing on Mac?

If you are also the one who is witnessing TurboTax is not installing on Mac, then don’t panic. Instead, perform the below-listed troubleshooting steps to overcome the issue instantly.

1. The users must verify whether their system can access the TurboTax on their Mac device. Below we have mentioned the system specifications; go through them.
  • Operating System: You must verify that your Mac operating system works on the macOS Catalina 10.15 or later for the 2021 edition. For the edition 2020, macOS Mojave 10.14 or later, 2019 edition, macOS High Sierra 10.13 or later. Also, it supports the operating system of 2018 Edition macOS X v10.2 or later having 64-bit.
  • Processor: The users must check that their Mac operating system must have a multi-core Intel processor with 64-bit space required.
  • Hard Disk Space:- Your system must have 1 GB of hard disk space to install the 2019-2021 edition of the software. Whereas, to install the 2018 Edition of the TurboTax software on your system, the hard disk space must be 650 MB.
  • RAM:- Moreover, your system must contain a minimum of 2GB of RAM to run the software smoothly on your device.
  • CD/DVD:- One must have a CD/DVD of the TurboTax software to install the application properly.
  • Internet Connection:- It has been advised that you must have 1 Mbps of the modem and be well-connected with a stable internet connection. Good network connectivity is required for product activation, software updates, and utilizing online features.
  • Screen Resolution:- It has been advised that the screen resolution must be 1024 X 768 or higher than this.
  • Mac-supported Printer:- You must ensure that the printer is compatible with your Mac device to print your tax returns.
2. You must ensure you log in to your TurboTax account with the proper administrator rights.
3. Before inserting the CD, you must look for any visible damage. If you find any damage to the CD, you can claim a replacement.
4. Try disabling file sharing. You have to move to the Apple menu > System Preferences > Sharing. Then, unmark all the options below the Services tab. Doing so, will end the process of sharing the files and thus helps resolve the issue.


Closure!!

We hope that you find this post worth reading and that it helps you install TurboTax on Mac devices easily. However, if you still have any inconvenience while installing the application, consult our experts. You can have a one-to-one conversation with our experts through email or live chat. Once you reach the experts, they will guide you in the best possible manner within the least time applicable.

How do I Clear and Start Over on TurboTax?

Preparing taxes was never an easy task, and it is time-consuming, involving absolute calculations, exact preparation, and authentic results. TurboTax taxation software was introduced with the main purpose of helping citizens to complete the tax detailing and calculations process smoothly. Sometimes, when a user starts preparing their task with the wrong version, they have to start again with TurboTax software.

Well, if you are also searching for a comprehensive guide about starting over on TurboTax, this blog will be very crucial for you. In this post, we will cover the complete procedure of how to start over on TurboTax. So, stay tuned and read this post till the last word.

Stuck with the Start Over on TurboTax and don’t know how to get it fixed? Ring us at +1 855 706 0905, and our experts will assist you with the simple ways to eliminate the error. 

How To Clear and Start Over on TurboTax Desktop?

If you are using the desktop version of TurboTax taxation software and want to start over on TurboTax from the beginning, then given below are the steps that you can execute to do so;

Deleting the “.tax” file:

Given below are the steps that you can execute to delete the tax return file from your TurboTax account;

  • Firstly, navigate to the My Documents folder on your PC.
  • Thereon, open the TurboTax folder, where you saved all the files.
  • In the documents folder, search for the file which you want to delete, and then click on the “Delete” option.
  • Moving ahead, move to the recycle bin and permanently delete the file.

Filing a New Return:

After you have deleted the tax file, then here are the steps that you can execute to file a new return;

  • First, launch the TurboTax desktop application on your PC.
  • Thereon, click on the “File” option, which is available at the top left side of the screen.
  • At last, click on the “New Return” option.

By performing the steps mentioned above, you have now successfullystart over on TurboTax desktop version.

Also Read: How to Upgrade TurboTax

How to Start Over on TurboTax Online?

Now, let’s take a look at the steps that you can follow to start over on TurboTax online version;

  • First of all, sign in to your TurboTax online account.
  • Thereon, choose a particular topic in which you want to continue your tax return.
  • Moving ahead, select the “Tax Tools” option, which is available on the left side of the screen.
  • After that, you can easily find an option of TurboTax clear and start over, and you can also locate this through the menu icon at the top right side of the screen.
  • Then, a confirmation pop-up window will appear on your screen.
  • There, you have to click on the “Yes” option.

How to Completely Start Over On TurboTax With Mobile App?

TurboTax allows users to start over on filing taxes with their mobile application. If you also want to start over on TurboTax with the mobile application, then here are the steps that you can follow to do so;

  • First of all, launch the TurboTax application on your mobile device.
  • Thereon, tap on the menu option available at the top-left side of the screen, and then select the “Log Out” option.
  • After that, launch a compatible web browser on your device, and use the application to sign in to TurboTax.com.
  • Now, click on the menu option available on the left side of the screen, and then tap on the “Tax Tools” option.
  • Moving ahead, select the “Clear and Start Over” option.
  • Thereon, a prompt window will open on your screen. Here, you have to tap on the “Yes” option.
  • Then select the “Log Out” option at the bottom of the left-hand screen.
  • Followed by the above steps, log in to your TurboTax mobile application, and check if you have got an answer to the question of how to start over TurboTax.

How to Re-fill TurboTax Taxes?

If you have already filed your taxes with TurboTax, then given below are the steps that you can execute to re-fill it;

  • First of all, log in to your TurboTax account.
  • Thereon, click on the “File Now” option available at the top side of the screen.
  • Moving ahead, select the “Start Over” option and choose the financial year you want to start with.
  • Now, follow the prompt instruction to provide the details again.

After that, you can keep following the on-screen instructions to re-fill the tax on TurboTax taxation software.

Ending Note

So, we hope you find this blog interesting. In this write-up, we have covered complete information about how to start over on TurboTax 2022. You can easily perform the methods listed above to clear and start over on TurboTax. If you still have any TurboTax queries, you can get in touch with our team. We are a team of professional experts who have mastered the skill sets related to TurboTax features and their uses. Send us your query now via chat box or mail at info@accountingwhizz.com. Our experts are working 24*7 at the help desk to attend to your query and provide the best feasible solution.

How to Fix QuickBooks not Responding Error? 

QuickBooks not responding is an erroneous condition in the program when you try to run QuickBooks, but it doesn’t respond. There are various instances of this error with which users search for it, such as QuickBooks not responding, QuickBooks has stopped working, QuickBooks crashing or freezing, and various others.

When performing an essential task in the program, you definitely don’t want to see this error. However, if it occurs, you are left with no option but to eliminate it. In this article, we will discuss possible causes, symptoms, and troubleshooting solutions to eliminate the error.

If you are clueless about how to fix QuickBooks not responding issue, connect with our professionals @ +1 855 706 0905 and get prompt help with the error resolution.

Also Read: QuickBooks Error H202

Message For Error QuickBooks Not Responding

When QuickBooks stops working, you will get an error message on your screen that reads- QuickBooks has stopped working. Besides, you will see a Windows-generated message – A problem caused the program to stop working correctly, or Windows is checking for a solution to the problem.

When you try to run QuickBooks again after getting the error message, the program quits automatically. However, the error message will not show up every time, but it may freeze without notifying you. When such an error message or error instance takes place when working on launching QuickBooks, high time that you look for its possible solutions.

How To Identify The QuickBooks Has Stopped Working Issue?

When the error occurs, it leaves behind some signs that can help you in determining the problem. On noticing the below-given symptoms of the error, you need to start troubleshooting without wasting a second. Check below:

  • QuickBooks freezes or becomes unresponsive right after you try to launch the application.
  • Before QuickBooks loads its dashboard, a warning message appears on your screen notifying you about the error.
  • The command given by the mouse or keyboard can’t make QuickBooks move.
  • QuickBooks quits in no time when you try to open it without giving any error message on your screen.
  • Your Windows also starts responding sluggishly when running the program on it.

Possible Reasons Behind QuickBooks Not Responding Issue

Now that we have discussed the signs behind the error, below are the possible reasons that can give rise to the “QuickBooks is not opening” error:

  • Essential Windows components are damaged that are required to run the program.
  • Damaged or corrupt areas on your hard disk.
  • Corrupt or damaged installation of the QuickBooks software due to the missing components.
  • QuickBooks is not properly installed on Windows and hence, giving issues when running it.
  • QBWUSER.INI file that contains the initialization information of the program; when it gets damaged, the error message crops up.
  • When the QuickBooks file name exceeds the maximum standardized limit, you need to cut it short.
  • Handy Procedures To Fix QuickBooks Not Responding Issue

Now that much has been discussed about the error, we can proceed further and perform some of the most suitable solutions to eradicate the QuickBooks has stopped working issue. Check below:

Solution* 1: Put QuickBooks Tool Hub To Use After Downloading It

QuickBooks Tool Hub is an incredible utility in the program that helps some of the most powerful tools within the program to launch and troubleshoot errors. To install and run the tool hub:

  • First things first, download QuickBooks Tool Hub and save the downloaded file on your Desktop.
  • Thereafter, go to the download location and run the executable (QuickBooksToolHub.exe) file to install the program.

Note: Close every program running in the background, which can interfere with the installation process.

  • Follow the instructions explained for installation to get it done.
  • To put the program to use, you need to agree to the terms and conditions.
  • Once the QuickBooks Tool Hub is installed, open it.
  • Select the Program Installation issues, and you will get to run QuickBooks Install Diagnostic Tool.

Note: QuickBooks Install Diagnostic Tool is a powerful tool that can resolve common installation issues related to QuickBooks Desktop software. If the error is caused due to the partial or damaged installation of the QuickBooks application, this tool can help. 

  • Run the tool and wait until the QuickBooks Install Diagnostic Tool resolves the common installation issues.
  • Restart your Windows and re-launch the QuickBooks application to check if the “QuickBooks has stopped” working issue is fixed.

If the same signs of the error are discussed herein, move to the next solution to perform the described steps.

Solution* 2: Rename QBWUSER.INI File By Adding .OLD At The End Of It

If the first solution fails, you need to repair the QBWUSER.INI file needed in the initialization of the QuickBooks application. It stores the product registration information, and therefore, when damaged, you may not be able to run QuickBooks smoothly. To repair the file:

  • Navigate to the folder location containing the file >> \Users\User Name \AppData\Local\ Intuit\QuickBooks.
  • You will be able to see the QBWUSER.INI file here.
  • If not, click Folder and Search options located underneath the Organize tab at the top left corner of the Window.
  • Now from under the View tab, mark the checkbox for the Show hidden files, folders, or drives option.
  • Moving ahead, click Apply, followed by clicking the OK tab.
  • Thereafter, right-click the file and select Rename option from the drop-down list.
  • Now add .OLD at the end of the file name so that it will look like QBWUSER.INI.OLD.
  • After that, launch QuickBooks and check if the QuickBooks application is working or not.

If this solution is not sufficient to eradicate the error, move to the next solution and perform the described steps.

Solution* 3: Examine And Fix The Bad Sections On Hard Drive

Bad sectors on the hard drives are also one of the apparent reasons that can evoke the error of QuickBooks not Responding. It can also impede the performance of the program running on Windows. In such a case, you need to find and fix the bad sectors on the hard drive to get rid of the error. Check below:

  • Press Windows + E keys together and right-click the C drive to open the Windows File Manager.
  • Next, select Properties located below Tools and hit the Check Now option.
  • Thereafter, mark the checkbox for “Automatically fix file system errors” and “Scan for and attempt recovery of bad sectors” options.
  • Once marked, hit the Start button and wait for the scan and repair process to finish.

Once done, try to check if the error is resolved or not. If the error continues, try the next solution to eliminate the concerning problem.

Solution* 4: Rename The QuickBooks File To Fix The Error

As we have discussed that additional characters in the file name can evoke the error. In such a case, you need to cut it short by renaming it. Follow the below-given steps:

  • Navigate to the folder containing the QuickBooks company file.
  • Now locate the file within the folder and right-click on it.
  • After that, right-click on the file and select Rename option.
  • Once done, reduce the characters and make sure that there are no special characters or spaces in the file name.

Now you can try to open the QuickBooks application and check if the error is resolved or not. If the error persists, implement the next solution on the error resolution.

Solution* 5: Reinstall Windows Operating System To Run QuickBooks Smoothly

Missing or damaged Windows components can prevent the smooth installation of the QuickBooks application. You may not be able to run a partially installed or damaged QuickBooks to handle your business accounting. In such a case, you can try to perform the below-given steps:

Note: Before you reinstall Windows, create a backup for your QuickBooks company file. The reason is that the process will remove the QuickBooks and company data file. It will be more suitable if you ask your IT admin to get it done. Also, you can reinstall QuickBooks once Windows is reinstalled.

  • Now that we have downloaded QuickBooks Tool Hub in the first troubleshooting solution, we can utilize it for error resolution.
  • Launch QuickBooks Tool Hub in the first place.
  • Once done, navigate through the list of the issues and select Installation Issues.
  • You will now get to open the QuickBooks Clean Install Tool.
  • Wait for the tool to finish the task.

To Put It All Together!

This post elaborates on how to fix QuickBooks not responding issue. After troubleshooting, you can run the program smoothly and handle your day-to-day accounting tasks. However, if you are unable to resolve the error for any reason, contact us and describe the issues. When we know what is stopping you from resolving the error, we will help you with the best solutions.

Easy Tactics to Fix TurboTax Form 2210 Error Hassle-Free 

TurboTax has gained immense popularity in the market as it offers easy e-filing services to make the tax-filing process easier. But like any other software, Users might sometimes witnessed a TurboTax Form 2210 Error while using the software on the device.

Moreover, this error might occur when the IRS doesn’t approve the TurboTax form that you have filed. However, numerous other causes might evoke the error. Therefore, to help you out, we have listed all the root causes that give rise to TurboTax Form 2210 Error. Also, we have elaborated the simple resolution methods to overcome the error below.

Reasons Why You Got Stuck With TurboTax Form 2210 Error

Once you understand the root causes behind the TurboTax Form 2210 Error, you can easily cope up with the issue. Here, we have listed some of the factors that might evoke the error.

1. You might experience this error when you have been charged for a penalty in payment.
2. It may also occur if you have shown a lesser amount of tax in the form.
3. Sometimes, the error might appear when you are not bound to file the form, but TurboTax still throws you the error.
4. Moreover, it might occur even if you have uploaded the right details in your form.

Stuck with the TurboTax Form 2210 Error and don’t know how to get it fixed? Ring us at +1 855 706 0905, and our experts will assist you with the simple ways to eliminate the error. 

Also Read: TurboTax Error 190

Prerequisites Required Before Resolving TurboTax Form 2210 Error

Look at the below-listed instructions to deal with the TurboTax Error 2210 permanently.

1.  To initiate the process, move to the duty document to start the review and for the error checks.
2. Thereafter, add 1 in the case and tap on the Expense Tools followed by the Devices option.
3. Following this, head towards the Erase a Form option, scroll down to the structure 2210 and remove it.
4. You are supposed to select the “Proceed with my Return” option.
5. Ultimately, you must run through the review and verify whether the error still exists.

Conditions and Solutions to Fix TurboTax Form 2210 Error

Whenever the user strikes the TurboTax Form 2210 Error, you will come across certain conditions while filing the form. Here we have described all such conditions and how to deal with them.

Condition 1: There might be the possibility that a penalty was imposed on your payment.

1. For instance, if part II box A is checked, you are entitled to the 85% waiver. In that instance, you cannot file the return electronically. Instead, you are supposed to print and file your return via mail.
2. Whereas, if the penalty is imposed without 85% waiver, you might be prompted with a full or half-time waiver. For such an instance, a waiver of penalty explanation is required. Also, you have to get back to the return and add a statement.
3. On the contrary, if you have no underpayment penalty computed in line 17, there is no need for the penalty explanation statement. You are required to return to the underpayment section of your return and then make the mandatory changes.

Condition 2: There might be a probability that you have proven a lesser quantity of tax in your form

Usually, the users might encounter Form 2210 TurboTax Error when the taxpayers display a lesser amount of tax in their form. Therefore, adhere to the following steps to resolve the issue.

1. Initially, you are supposed to go back to your tax return and then move to the next step.
2. Soon after this, opt for the Different Tax Scenarios option, followed by the Underpayment penalties.
3. Now, hit the Ok button when prompted for possible penalties exceptions.
4. At last, you are supposed to upload the precise tax legal liability.

Condition 3: You are not restricted to filing the form, but you might come across the error

Go through the stepwise instructions listed below to deal with the error.

1. In the beginning, you are supposed to check the error.
2. If you find a form 2210 error on your computer screen, you have to add 1 in the box.
3. Now, you are required to change to the forms mode.
4. After this, remove the form 2210 form entirely, and then verify whether the error persists.

Condition 4: There might be instances that you are obtaining the error even after uploading the right details in your form

.
In such a scenario, you have to connect with highly-experienced TurboTax experts. The experts will assist you in dealing with the root cause of the issue and how to overcome it right away.

Condition 5: Your form is not approved by the IRS even after correctly uploading all the details in the form.

This is the most commonly occurring issue that might occur among the software users of the product. In certain cases, the users must consult with the TurboTax experts by placing a call. Once you contact the experts, they will guide you with the best possible assistance within the shortest time possible.

Stepwise Instructions To Fix TurboTax Form 2210 Error in Online Version

Are you unable to resolve TurboTax Form 2210 while using TurboTax Online? If yes, go through the instructions listed below to easily resolve the error.

1. Open your Tax file in the TurboTax application and check whether you receive a Form 2210 A1 error.
2. If you get this error on your screen, enter 1 in the box and tap on Tax Tools. You will locate this option on the left side of the screen.
3. After this, head toward the Tools option, followed by the delete a form option.
4. At last, hover your cursor over the “Continue with my return” option.

Detailed Procedure to Rectify TurboTax Form 2210 Error on the Desktop

If you are having difficulties while fixing the TurboTax Form 2210 error, follow the instructions below.

1. In the initial stage, open the TurboTax software on your system and then look for the error.
2. If a 2210A1 error pops up on your computer screen, enter 1 in the box.
3. After this, you have to switch to the forms mode.
4. Once you have applied all the above-listed steps, you can delete the 2210 form from the record.

Final Thoughts!!

Here we conclude this post and hope that the information covered in this post is enough for you to tackle TurboTax Form 2210 Error. Even after implementing these solutions, if you can’t file the form, you must connect with our TurboTax professionals. Our experts will patiently listen to your query and assist you with simple solutions to overcome the issue. You can connect with our TurboTax experts via live chat or email.

How to Change Email on TurboTax? An All-Inclusive Guide

Wondering how to change email on TurboTax and looking for the perfect blog to do so? If that’s so, then you have arrived at the correct destination. This comprehensive post contains all the necessary information to change the email address.

At times, the users must change the email address of TurboTax if they need to remember the email id. Otherwise, they need to change it for security purposes to safeguard your data from getting into the wrong hands. Therefore, to make it easier, we have listed the step-by-step instructions so that you can easily change the email address.

Also Read: How to Upgrade TurboTax

Getting issues while trying to change email on TurboTax and need instant help? If that’s the scenario, dial +1 855 706 0905 and let the team handle it for you. 

Learn how to change my email on the TurboTax Application

Sometimes, the question might arise in the user’s mind on how to change email on TurboTax. Therefore, to answer this question, we have provided you with the stepwise instructions for the same. Ensure that you follow the instructions in the same manner as written below to avoid further issues.

1. In the beginning, you have to log in to your TurboTax account using the correct login credentials.
2. After this, move your cursor to the lower left corner and click on the Intuit Account option.
3. As a result, it will take you to the Welcome! Screen. In this window, choose the highlighted Sign in & Security option.
4. Furthermore, choose the Email Address option and add the email address you want to link with your TurboTax account.
5. Then, enter the same email address mentioned above again to verify that you have added the correct email address. ‘
6. After entering the details, cross-check to avoid further issues.
7. Later, tap on the Save option to save the necessary changes, and click on the Ok option.

For instance, if you notice that you don’t have access to the TurboTax email address anymore and couldn’t sign in to the TurboTax. You must fill in the Account Recovery Request Submission form properly in that scenario.

Stepwise Instructions to Change TurboTax Login User ID

Before changing the TurboTax User ID, you are supposed to sign in to your TurboTax Online Account. For that, go through the stepwise instructions listed below.

1. Begin the process by signing into your TurboTax account.
2. From there, take your cursor to the left corner of the screen and then opt for the Intuit Account option.
3. Following this, move to the Manage your Account section and tap on the Sign In & Security option.
4. Now, you must choose either a User ID or password to make the desired changes.
5. Add the new details correctly within the required text fields.
6. Later on, ensure that you have saved all the information after adding the new user ID.

What should I do to Update my TurboTax Account Information?

Do you need to learn how to update your TurboTax account email, phone number, or password? If that’s the case, go through the steps listed below.

  1. Initially, you must log in to your TurboTax account with the correct login details.
  2. Soon after this, choose the Intuit Account from the menu, which is located above the Sign Out option.
  • To update the User ID, password, or phone number, you must opt for the Sign In & Security option.
  • If you wish to modify your name, date of birth, address, or occupation, click on Personal Info.
  • To update your email address, you must complete the Account Recovery form.

To update your TurboTax Advantage account, go through the points listed below.

1. Firstly, you must log into your TurboTax Advantage Advantage account.
2. After signing into your TurboTax account, tap on the Billing and Shipping Info option to confirm or update your payment details. Also, it saves your billing address successfully.
3. Now, opt for the TurboTax Advantage to view, alter or remove the TurboTax product on order.

Stepwise Instructions To Change TurboTax Password

Sometimes, the users might need to change the TurboTax password for different reasons. One of the reasons may be that your TurboTax account is hacked, and your personal information is at stake. Another reason is that you have shared your TurboTax account password with the person who might help you file the tax return.

If you are searching for the stepwise instructions to change the TurboTax password, then implement the below listed steps closely.

1. Initially, you have to visit the Account Recovery Page of TurboTax.
2. Afterwards, add any one of the following details:

  • Phone Number
  • Email Address
  • User ID

3. Now, you have to implement the steps according to the on-screen instructions. As a result, TurboTax will modify them as per the information provided. Also, they will check whether they can recognize the device.
4. Once you are done, you will get the code to recover your TurboTax account. Otherwise, they will provide you with the attached list of accounts according to the information.
5. Furthermore, if you still cannot restore the account, tap on the “Verify my account a different way” option from the Accounts Recovery Page. You might be prompted with additional questions so they can verify your identity successfully.

Steps to Change TurboTax Password in Mobile Application

The steps to change TurboTax Password in the mobile application may vary; go through the following points listed below.

  1. In the beginning, launch the TurboTax mobile application on your device.
  2. After this, you must enter your email address, User ID, and password. Then, click on the highlighted Sign In tab and move ahead.
  3. Consequently, you will obtain the verification code if you have added the mobile number or email address. Further, you have to enter the verification code in the required text field.
  4. Following this, you have to opt for the User ID using which you want to login into your TurboTax account.
  5. Furthermore, opt for the “Sign in a different way” and then move to the next step.
  6. Subsequently, you will get the options according to the information provided by the TurboTax software. You may recover your account without a password if you can receive the verification code on your registered email address.
  7. For instance, if you are facing issues while accessing the email address or phone number linked to your account. In that instance, you have to choose the “Verify a different way” option. As a result, it will take you to the Accounts Recovery Request tool, where you can reset your password.

Closure

So this has been all about how to change email on TurboTax. We hope you now have access to your email account. Thus, you can now easily use the TurboTax account for filing the tax return. However, if you still have doubts, consult our experts to obtain the best possible assistance. You can use the email or live chat facility to connect with our experts.

An Illustrative Guide on How to Upgrade TurboTax

TurboTax is the widely used software that helps businesses file their tax return accurately and timely. Like any other software, Intuit also releases several upgrades and updates to improve the application’s performance. Therefore, it is crucial to upgrade TurboTax to the currently released version so that you can enhance your tax-filing experience.

However, we have discussed the procedure in this blog to help you upgrade TurboTax to the higher version. Also, we have explained why there is a need to upgrade the tax-filing software below.

Need help Upgrade TurboTax to the most recently launched version? Speak with our experts at +1 855 706 0905 and learn some useful tips to do the same. 

Significance of Upgrading the TurboTax to the latest version

The users are required to upgrade TurboTax software to the higher version to access the improved functionality and features of the application. Apart from this, there are plenty of other reasons to upgrade the software.

  1. The users need to upgrade the TurboTax software because it has new features. With the help of the new and enhanced features, you can improve your tax-filing experience.
  2. The application upgraded to the latest version must have better efficiency than the outdated software. Also, it helps eliminate the time you usually spend filing taxes.
  3. With the upgraded version of the TurboTax software, there would be less possibility of encountering issues. In other words, the users won’t get issues that usually occur due to outdated TurboTax versions.
  4. Moreover, you can also get access to top-notch security features so that you can secure your tax-related information. Thus, it helps reduce the risk of data loss or damage that might cause a huge loss to your company.
  5. You can also access the best assistance if you encounter any issues while operating the tax filing software.

Detailed Procedure to Upgrade TurboTax for Windows Users

At times, the question might arise in the user’s mind of how to upgrade TurboTax from a lower version to a higher one in Windows. Therefore, to help you with that, we have listed some of the simple steps to do the same.

  1. Begin the process by opening the tax return in TurboTax. Then, click on the highlighted Upgrade TurboTax option present at the bottom of the screen. (Note: If you are facing difficulty locating the Upgrade option, go to the Help menu from the top menu).
  2. Following this, you have to make the appropriate choice of the version in which you want to upgrade your TurboTax software. Here, you must ensure that you have picked the newly launched software version.
  3. Afterwards, head towards the Upgrade Now option and then click on it.
  4. Now, follow the directions as displayed on the screen and then go ahead by purchasing the upgrade.
  5. After the upgrade, continue working on the tax return using the TurboTax software. The users won’t have to start from the beginning to continue further with the ongoing task in the TurboTax software.

Steps for Upgrading to the Higher Version of TurboTax Online

  1. Before starting the process, check that you have signed in to your TurboTax account. Also, check that you have opened the tax return on your device.
  2. If you won’t see the Sign In option, you must hit the Upgrade option from the menu.
  3. Choose the version in which you have to upgrade the application. Here, you must ensure that you have picked the most recently launched version of TurboTax software.
  4. Eventually, you might be prompted whether you want to print or e-file your tax returns. You can also implement the following steps to pay the taxes in advance.◦ First of all, click on the File menu > Start or Revisit option located behind the Review your Order option.
    ◦ As a result, it will present the summary of your order on your computer screen. Further, you have to pick the “View Payment Options”.
    ◦ Proceed further until you get the screen with a message stating, “How would you like to pay for TurboTax?”. You have to tap on the Pay with Credit Card option in this window.
    ◦ Following this, fill in all the credit card details and click on the Continue button.
  5. After filing all the taxes in the TurboTax software, you may access the Tax Home to access all of the upgraded features.

Also Read: How to Change TurboTax Password

How to Upgrade TurboTax Plus Using These Simple Steps?

Are you encountering issues while upgrading TurboTax plus and don’t know how to proceed further? If that’s so, go through the steps below to upgrade to the Plus version of TurboTax.

Case 1: Upgrade to TurboTax Plus 2018 Version

If you want to access the previous year’s tax return and haven’t paid for the TurboTax 2017 version for the Plus edition. Then you have to upgrade TurboTax Plus 2018 version. For that, you need to go through the following points attentively.

  1. In the beginning, log in to your 2018 account using the same user ID you generated for a previous year’s online tax return.
  2. Now, fill in all the personal details within the required text fields. Then, from the screen’s left side, choose the option of Upgrade.
  3. You have to scroll down until you get the Plus More Help & Tools option and then click on it.
  4. Following this, tap on the Upgrade Now option. (If you notice that the plus is grayed out, it represents that you are already using an upgraded TurboTax Plus).

Case 2: Upgrade Free Edition to TurboTax Plus Edition

For instance, if you have already filed the tax return 2018 via Free Edition without Plus, you must upgrade to TurboTax Plus. Moreover, you also have to pay first to get access to the previous year’s return. Follow the stepwise instructions listed below to upgrade to TurboTax Plus Edition.

  1. Initially, open the web browser of your choice and then type “TurboTax.com” within your browser’s address bar.
  2. As a result, it will take you to the main website of TurboTax. In this window, navigate and tap on the “show” option to have a look at all your tax returns and documents.
  3. You must choose the highlighted “Add a State” option. (Here, you don’t have to mention the state, but you have to return back to the page for upgrading to Plus).
  4. After this, hit the “Upgrade” option at the left side of the menu and click Print Center.
  5. Choose the highlighted “Print This Year’s Return”. (You must ensure that you aren’t giving commands to print the prior year return. Otherwise, it will knock out of the return immediately).
  6. Ultimately, select the “Pay Now” option to make payments for the Plus edition to access the prior year’s return.

Stepwise Instructions For TurboTax Upgrade from Deluxe to Premier

Go through the simple steps listed below for upgrading TurboTax Deluxe to Premier. Ensure that you follow the steps listed below.

  1. Begin the procedure by visiting the official website of TurboTax.
  2. Soon after this, choose your TurboTax product, and then you might be prompted about how you filed the last taxes.
  3. Now, you have to sign into your account using the login credentials associated with the TurboTax account.
  4. Then, you might be prompted whether you want to upgrade the TurboTax software.
  5. At last, go through the on-screen prompts to accomplish the TurboTax Upgrade process.

Final Thoughts!!

Here we conclude this post and hope you can now easily upgrade TurboTax to the newly launched version. Even after implementing the steps listed above, if you need help upgrading the application, then reach out to our experts. You can connect with our professionals through email or live chat and they will connect with you in no time. Then, they will provide you with the best possible assistance to resolve the issue instantly.

How to Use QuickBooks PDF Repair Tool?

QuickBooks is a featured rich accounting software that helps small and medium-sized businesses manage their financial and accounting services. Although, facing issues while working on the QuickBooks software is quite common nowadays. Sometimes, users face many errors when printing documents such as invoices, checks, pdfs, and print previews. Intuit specially designs QuickBooks pdf repair tool to identify the errors that arise while accessing the pdf and print feature in QuickBooks.

Printing any document in QuickBooks requires help from various Microsoft components such as XPS Document writer, MSXML, print spooler service, etc. If you also want complete instructions about using the QuickBooks pdf repair tool, then you can read this post till the last word.

System Requirements to Use QuickBooks PDF Repair Tool

Let’s take a brief look at the minimum system requirements that your system must meet to use the pdf repair tool for QuickBooks;

  • All versions of windows are highly compatible to use QuickBooks pdf repair tool.
  • A high-speed internet connection.
  • Free storage space of 512 MB and at least 1 GB of RAM.
  • A minimum 266 MHZ fast processor to install the tool.
  • Minimum screen resolution size of 1024 X 768.

Which Issues Can Be Resolved With QuickBooks PDF Repair Tool?

Below, we have listed some of the common printing errors that can be resolved with the help of the QuickBooks pdf repair tool;

  • No pdf file component issue.
  • QuickBooks desktop application not responding or is unresponsive.
  • Unable to print a document due to a missing component.
  • Unable to save pdf files.
  • PDF converter activation issue -41, -30, -20
  • QuickBooks unrecoverable error.
  • Facing issues while printing reports and transactions.
  • Damaged or corrupted components such as spooler services, XPS Document writer, MSXML, etc.
  • The printer stops responding during the printing command.

Why Does QuickBooks Pdf and Printing Error Arises?

Some of the possible reasons why QuickBooks PDF and printing error arises are as follows;

  • The PDF converter is offline or disconnected.
  • An outdated version of the QuickBooks desktop application can be the primary reason for the error.
  • Unstable or weak internet connection.
  • The pdf or document is missing from the system.
  • Another reason can be the outdated version of QuickBooks software or the windows version.
  • The print driver host not working, can also lead to the occurrence of the error.
  • QuickBooks framework is facing issues with communicating with the printer.

How to Use QuickBooks PDF Repair Tool?

Let’s discuss the different methods that you can follow to use the QuickBooks pdf repair tool to resolve printing and pdf Issues in the QuickBooks desktop application;

METHOD #1. Run QuickBooks PDF Repair Tool From QuickBooks Tool Hub

The QuickBooks tool hub is an all-in-one repairing tool that includes multiple in-built tools that help resolve errors in QuickBooks. To use the QuickBooks pdf repair tool, users must first download the QuickBooks tool hub on their device.

Step A. Installing QuickBooks Tool Hub

Given below are the steps that you can follow to execute to install QuickBooks install tool hub;

  • Firstly, close the QuickBooks desktop application on your device.
  • Thereon, launch a compatible web browser on your device, and download the latest version of QuickBooks tool hub (1.5.0.0).
  • Save the downloaded file to the location where you can access it easily.
  • After that, as the downloading ends, then double-click on the downloaded file to open it.
  • Moving ahead, keep following the on-screen instructions to get the tool installed on your device.

Step B. Running QuickBooks PDF Repair Tool

Once you have installed the tool, the next step is running the QuickBooks pdf repair tool on your device. Given below are the steps that you can follow to do so;

  • Firstly, double-click on the QuickBooks Tool Hub icon available on the desktop screen to launch it.
  • Thereon, click on the “Program Problems” option, which is available on the left side of the screen.
  • Click on the “QuickBooks PDF and Print Repair Tool” option.
  • The repairing process will commence on your screen within one or two minutes.

As the repairing process ends, launch the QuickBooks desktop application and try to print a pdf or document to check whether the QuickBooks pdf repairing tool is working efficiently.

Method #2. Reset Temp Folder Permissions

Another method through which you can use the QuickBooks pdf repair tool is by resetting temp folder permissions. Given below are the steps that you can execute to do so;

Step A. Resetting Temp Folder Permissions

  • Firstly, press the “Windows + R” keys on your device to open the windows run command.
  • After that, type “%temp%” in the insert field and press the enter button.
  • As the temp folder opens on your screen, right-click on the free space and click on the “Properties” option.
  • Moving ahead, click on the “Security” tab option, then checkmark all the usernames and groups to permit full control.
  • After allowing the permissions, then try to save a pdf.

Step B. Allow Print Confirmation

  • First, open a notepad on your device.
  • Thereon, write anything randomly in the notepad for testing purposes.
  • Moving ahead, navigate to the “File” and click on the “Print” option.
  • Now, select the “XPS Document Writer” option, and again click on the “Print” option.
  • Thereon, choose the desktop option under the “Dialog” box.
  • At last, move to the QuickBooks desktop application, and verify if you can view the XPS document you have printed from the notepad.

By performing the steps mentioned above, you can use the QuickBooks pdf repair tool to take a printout from the QuickBooks desktop application.

Also Read: What’s New in QuickBooks Mac Plus 2023

Method #3. Rename the QuickBooks Printer File

The next solution you can execute to resolve QuickBooks pdf and printing issues is renaming the QuickBooks printer file. So, here are the steps that you can execute to rename the QuickBooks printer file;

  • First of all, users have to search for the files.
  • Thereon, perform right-click on the file and select the rename option.
  • With that effect, rename the files to “qbprint.old” and “wpr.old”.
  • Now, launch the QuickBooks desktop application, and access the company’s files.
  • After performing the above steps, select the file and the “Printer Setup” option.
  • Then, select the transaction in the form name, and click on the “OK” option.
  • At last, reset the printer settings in the user software.

Method #4. Reinstall, Test, and Change Permissions for XPS Document Writer

Step 1. Test XPS Document Writer and Print Outside QuickBooks
  • First, open any document, click on the “File” menu option, and then select the “Print” option.
  • Thereon, the printer’s window screen will appear on your screen.
  • Here, you must select your “Microsoft XPS Document Writer” under the list of printers.
  • Now, save the “.xps file, and then move to the desktop, and search there for the “.xps file.”
  • If you find the “.xps file” there, then try to open it. If you face an error while opening it, or if the file does not display correctly, you have to reinstall the XPS Document writer.
  • If you can’t find the file there and didn’t face any error while saving it, then the security settings may be an issue. The security settings may block you from printing or deleting the .xps file.
  • The other scenario is if QuickBooks encounters a problem while trying to print, or if the XPS Document writer is unavailable, you have to install it again.
Step 2. Make Sure That You Have Enabled XPS Services
  • Firstly, launch the windows file explorer on your device by pressing the “Windows + E” keys together.
  • Thereon, click on the “Computer” tab available on the upper left side of the screen.
  • Moving ahead, click on the “Uninstall” or “Change a Program” option, and then select the “Turn Windows Features on or off” option.
  • Moving ahead, scroll down on the page, and make sure that the XPS services and XPS viewer options are enabled.
  • If any option is disabled, checkmark the boxes immediately to enable it and click on the “OK” option.
  • On the other side, reinstall the XPS printer if both features are enabled and you still face the error.
Step 3. Reinstalling Microsoft XPS Document Writer

The next is to reinstall the Microsoft XPS document writer on your device. Below listed are the steps that you can execute to do so;

  • First, navigate to the PC’s settings and click on the “Control Panel” option.
  • Moving ahead, click on the “Devices and Printers” option and select the “Microsoft XPS Document Writer” icon.
  • Now, click on the “Remove Device” option and select the “Yes” option to confirm the request.
  • Under the toolbar, click on the “Add a Printer” option, and then you have to add the local printer or network printer with manual settings.
  • Thereon, you have to select the “PORTPROMPT: (Local Port) under the use an existing port, and then click on the “Next” option.
  • After that, under the manufacturer list, you have to select the “Microsoft” option, then “Microsoft XPS Document Writer v4” and then click on the “Next” option.
  • Moving ahead, you have to click on the “Replace the Current Driver” option and then select the “Next” option.
  • Under the printer name field, you have to remove the “v4” part.
  • Therefore, the printer’s name will be “Microsoft XPS Document Writer,” and then click on the “Finish” option.
Step 4. Change Windows User Permissions For XPS Document Writer
  • Firstly, navigate to the printer’s control panel on your windows device.
  • Thereon, right-click on the “Microsoft XPS Document Writer” and then click on the “Printer Properties” option.
  • After that, you have to click on the “Security” option and select the “Everyone” user group option.
  • In case, if you notices that the Everyone user group is not listed, then click on the “Add” button. After that, type “Everyone” in the insert field, and then select the “Check Names” option, and then click on the “OK” option.
  • Now, click on the “Print” option, which is available in the Allow column, and click on the “OK” option.
  • After that, launch the windows file explorer on your device, and then navigate to the C:\ Windows\ System32\ spool.
  • Click on the “Printers” option and select the “Properties” option.
  • Next, select “Security” > “Edit” > “Add,” and then type “Local Service” and then press the enter button.
  • You must ensure that the local service is granted full control and click on the “OK” option.
  • Last, launch the QuickBooks desktop application, and try to create a new pdf file.
Step 5. Rectify Security Software Settings

The security software settings can also act as a hindrance to creating .xps files. Therefore, you are required to check the security software settings and make sure that .xps files are not blocked.

Step 6. Repair or Install MSXML 6.0
  • First, open the windows run command on your device, type “Command” in the search box, and press the enter button.
  • Moving ahead, you have to click on the “Command Prompt” option and select the “Run as Administrator” option.
  • You will be asked to provide the administrator login details and click on the “Allow” option.
  • At last, type “sfc/ scannow.”
Step 7. Create a New Form Template

If the template of the user’s form is damaged or corrupted, it can be another reason leading to the issue. Therefore, you must create a new form template to deal with the issue.

  • Firstly, create a new template for the form.
  • Thereon, change the transaction template and create a new .pdf file.
Step 8. Bypass Print Spooler For Terminal Services
  • Navigate to the printer’s control panel on your windows device.
  • Thereon, right-click on the “Microsoft XPS Document Writer” and then click on the “Printer Properties” option.
  • After that, click on the “Advanced” tab and select the “Print Directly to Printer” option.
  • Save the updated changes by clicking on the “OK” option and then closing the printer properties window.

Ending Note

This blog has provided enough information about using the QuickBooks pdf repair tool. Above, we have covered the steps and procedures you can follow to use the pdf repair tool in QuickBooks. If you have any queries related to the topic or are still facing issues using the QuickBooks pdf repair tool, you can get in touch with our team of experts. Our experts are available 24*7 at the help desk to assist you in easily using the QuickBooks accounting software. You can write us your query via mail at info@accountingwhizz.com or chat with our experts through the chat box.

Best Tutorial to Troubleshoot Sage 50 Cannot be Started Error

Sage is a wonderful accounting software that helps businesses to manage their accounting tasks more conveniently and smoothly. Also, it reduces the efforts of the accountants by spending a lot of time manually creating the records of the employees. Despite being excellent software, it is still prone to certain issue. One of them is the Sage 50 cannot be started errors that might occur while accessing the Sage 50 software on the system.

The users might also encounter the error while accessing the unsupported version of the Sage software. Whenever the error occurs, it prevents users from doing their ongoing business accounting tasks. However, getting rid of the issue as soon as possible is necessary so they can continue with their work without any hassle.

Looking for instant help to get rid of the Sage 50 Cannot be started error immediately? Give us a Call @ +1 855 706 0905, and feel free to have a one-to-one conversation with our experts to obtain the best working solutions. 

The Notification you Received when you Encountered Sage 50 Cannot be Started

The users might get any of the following error messages on the occurrence of the error.

  1. Error: Sage 50 cannot be started. When pervasive is not running or needs to be restarted.
  2. Error Sage 50 cannot be started, and my computer operating system is Microsoft Windows 8 8.1 or 10.
  3. Error: Sage 50 cannot be started and have Microsoft .net framework errors in the event viewer.
  4. Error: Sage 50 cannot be started, and pervasive service is missing or cannot be restarted.

Reasons Why You End Up With Sage 50 Cannot Be Started Error.

Before moving ahead to the troubleshooting part, the users must be aware of the root causes that may trigger the error. This is so that you can apply the troubleshooting solution as per the cause of the error. Therefore, to update you on them, go through the below points.

  1. Sometimes, the users might encounter errors due to damaged files or corrupted folders.
  2. One of the reasons that might trigger Sage 50 cannot be started error is outdated versions of the Sage 50 software.
  3. It might be possible that the company file has damaged files or folders.
  4. Also, it might evoke due to the damaged file path.
  5. Moreover, it might appear due to an unstable or poor internet network connection.

Also Read: Sage 50 2021 Download

Simple Solutions to Fix Sage 50 Cannot be Started Error Hassle-Free

Once you know the root causes that might lead to the error, you can fix the issue easily. For that, you have to perform the steps listed below attentively.

Method 1: Problems Associated With the Compatibility Settings

At times, users might encounter errors because of compatibility issues with the Sage software. Therefore, verify the compatibility settings of Sage 50 by performing the steps listed below to fix the issue.

  1. To initiate the process, find the sage 50 icon on your desktop, and right-click on it to open it on your system.
  2. Proceed further by tapping on the Properties tab.
  3. Following this, mark the checkbox next to “Run this program in a secure mode”.
  4. As a result, it will open an Editor window on your computer screen. Further, insert the code “[k0w16]” and then hit the Continue option.
  5. Afterwards, click on the Ok option and exit the Sage 50 Properties window.

Method 2: Run the software using admin credentials after installing the software  again


  1. In the initial stage, restart your PC and then sign in using the proper admin credentials.
  2. Now, you have to browse to the path, which is as follows: “C:\Segments 50_20xx_xProgram-Files (where xx is the year and _x is the product update number if it exists)”.
  3. Afterwards, right-click on the file named “.exe” and then opt for the Run as administrator option.
  4. Whenever you get a pop-up, you must select the Repair option.
  5. Now, you have to wait until the installation process is over.

Method 3: The creation of the shortcut is necessary

  1. First, right-click the Sage 50 shortcut and then opt for the Delete option.
  2. You don’t have to think anymore, as it won’t remove your application altogether.
  3. After this, look for the program path, and once you find it right-click on it.
  4. Choose the Send option and then go to your desktop.
  5. You can create a new shortcut on your desktop screen using this method.
  6. Moreover, you may also assign a new name to the newly generated shortcut. Giving a new name will help you to differentiate it from the old one.

Method 4: Repairing of the Reports Folder

There might be the possibility that the users might come across the error due to damage or corrupt reports folder. Therefore, fixing the damaged reports folder is necessary by performing the steps listed below.

  1. To begin the process, firstly, you must exit Sage 50 from all systems on the server.
  2. Now, search for the location, and then you will see your system host.
  3. Soon after this, you have to rename the server.
  4. End the process by tapping on the symbol of the Repair tool, and it will repair your reports folder successfully.

Method 5: Allow the Repair Tool To Run


  1. To initiate the process, click on the Start menu and then open the Run window on your system.
  2. After this, input “appwiz.cpl” into the search column of the Run Window and then hit the Enter key.
  3. Following this, right-click on the Sage 50 accounting and then opt for the Change option.
  4. Now, go to the Repair option, followed by the Change option.
  5. In the end, choose the Finish option to accomplish the task.

Method 6: Remove and Install the Sage 50 Software Again


  1. Initially, tap on the Start menu and type “Control Panel” within the search column.
  2. As a result, it will redirect you to the Control Panel window.
  3. From there, move to the Programs and Features. Then, pick the Sage 50 version from the installed applications list.
  4. Once you find the Sage 50 application, right-click on it and choose the Uninstall option.
  5. After this, you have to get the latest version of Sage 50 software on your system.
  6. Move to the download folder and double-tap on the downloaded setup file of the Sage application.
  7. Select the Yes option to continue and tap on the Install option to initiate the installation process of Sage 50.
  8. Pick the appropriate language and then hit the Ok option.
  9. Give your consent by agreeing to the terms and conditions mentioned in the License Agreement.
  10. End the process by tapping on the Finish option.

Let’s Wrap it Up!!

Here, we sum up this post. We hope that this post contains enough information necessary to fix the “Sage 50 Cannot be started” error. However, if you find any discrepancies while implementing these solutions, feel free to connect with our experts. Our experts are ready to guide you with the best working solutions to resolve the issue permanently. You may consult with our experts through email or live chat.

How to Fix QuickBooks Migration Failed Unexpectedly

At times, the users need to transfer QuickBooks data to a new system for better configuration, more space, etc. This is the time when the QuickBooks Migrator tool comes into view. The main use of this tool is to migrate QuickBooks data from an old system to the new one. However, while migrating QB from the old PC to the new one, the users might get stuck with QuickBooks migration failed unexpectedly error.

As a result, the users won’t be able to transfer the old QuickBooks data to the new system. Thus, it hampers the ongoing business operations and puts the ongoing work at a halt. If you are also discovering the same issue, then don’t panic and go through the troubleshooting solutions listed in this post to fix it.

Also Read: Upgrading QuickBooks 2019 to 2022

Need immediate assistance to deal with the QuickBooks Migration Failed issue? Ring us at @ +1 855 706 0905 and connect with our QuickBooks Experts to avail the best possible assistance to overcome the error. 

Data that you can Transfer via QuickBooks Migrator Tool

Using the QuickBooks Migrator Tool, you can only transfer some required data to keep the application up and working on your system. Therefore, to let you know which data you can transfer or not, go through the following points listed below.

A: Data that the Migrator Tool is capable of migrating

1. You can easily transfer QuickBooks letters and templates and scheduled and memorized reports.
2. Also, you can copy the last three company files you opened on your old PC.
3. The users can transfer local attachments, advanced reports, cash flow projectors, and local attachments.
4. Moreover, you can also transfer related files, forms, custom templates, statement writers, and loan managers.

B: Data that the Migrator Tool won’t transfer

1. QuickBooks Desktop won’t allow you to copy the configuration of a new computer while using the application in multi-user mode.
2. If you are accessing Intuit Data Protect to generate the backup of the company file, remove QB from Old PC. Then you have to log in again to your company file on your new PC.
3. For instance, if you have already set up the payroll services on the old computer, you need to sign in again on the new PC. Doing so will ensure that your data will remain safe and secure from cybercriminals.
4. You must know that you won’t be able to copy the manual backup of the company file.
5. Moreover, you can only copy up to the last 3 data files opened on your system. If you have other company files, then it will be transferred automatically.

Also Read: Sage 50 2021 Download

Reasons Why QuickBooks Migration Failed Error Takes Place

The users might get stuck with the QuickBooks Migration Failed error while using an outdated version of the QuickBooks Migrator tool. Apart from this, there are plenty of reasons that might strike this error, which are as follows:

1. It might be possible that you are operating the version of QuickBooks which is not in use anymore.
2. Sometimes, it may trigger when QuickBooks is interrupted due to the inappropriate configuration of the Windows operating system.
3. Also, the users might come across QuickBooks Migration Failed Unexpectedly error when the migration file service gets corrupted.

Simple Procedures to Overcome QuickBooks Migration Failed Error

We understand how annoying it is when you get stuck with QuickBooks Migration Failed Unexpectedly Error while moving old QB data to a new computer. Therefore, to deal with this issue, we have provided you with some simple resolution methods to eliminate the error.

Also Read: QuickBooks Error H202

Procedure 1: Get the Updated Version of Windows

You can fix QuickBooks Migration Failed Unexpectedly error by using the newly launched version of Windows on your system. Therefore, to update the Windows operating system, perform the following steps properly.

1. Firstly, tap on the Windows icon and click on the Settings menu.
2. Soon after this, you have to look for the Windows Update option.
3. Once you get the Windows Update option, click on it.
4. Now, open the QuickBooks Desktop and try migrating the QuickBooks data to the new computer.

Procedure 2: Regenerate your QuickBooks Company Files:-

The users can use the QuickBooks Migrator Tool to reestablish the company files. Moreover, you can also search and copy the QB company file from the backup file manually. To restore your company file, implement the following steps properly.
1. Begin the process by copying the backup file on your new Windows PC.
2. Now, you have to open the folder containing your QuickBooks backup file.
3. Afterwards, open the folder named “Restored_ CompanyName_Files”.
4. Proceed further by right-clicking on the folder and then opt for the Copy option.
5. Next, you have to paste the file within the required location.

Also Read: Change TurboTax Password

Procedure 3: Migrate the QuickBooks Company File to a new computer

To transfer the QuickBooks Desktop data to the new computer, adhere to the following instructions.

1. Initially, you have to install the QuickBooks Desktop on your system.
2. After this, you need to generate a backup of your old QuickBooks Desktop data.
3. Thereafter, you are required to copy the particular backup of your new system.
4. Now, open the QuickBooks application and then restore the specific data file. Then, go through the on-screen instructions to accomplish the restoration process.

Procedure 4: Transfer the Entire QuickBooks Data Folder

There might be certain instances when the users might strike QuickBooks Migration Failed Unexpectedly error when you haven’t sent the entire folder on a new PC. Therefore, to avoid the issue, ensure that you have sent the entire folder instead of the data file to a new PC.

Here, we have listed some of the simple steps using which you can easily transfer the QuickBooks data folder.

1. Begin the process by opening the QuickBooks Desktop on your system. Then, search for your company file.
2. Now, hit the F2 key on your keyboard to bring the Product Information window to your screen.
3. Now, you must navigate the File Information section and locate your data file.
4. Afterwards, tap on the Start menu and choose File Explorer to open it on your device.
5. Following this, you need to access the given company file folder.
6. Once you get the folder, right-click on it and then opt for the Copy option.
7. End the process by pasting the particular file into the required location.

Procedure 5: Make Use Of Intuit Data Protect Plan

With the help of Intuit Data Protect Plan, you can easily prepare the backup of the company file. To use this feature, you have to apply the steps listed below.

1. In the first step, generate a backup file of your QuickBooks company file.
2. Following this, you must log in to Intuit Data Protect on your new computer.
3. Thereafter, move to the File menu within the QuickBooks application.
4. You need to pick the Backup Company option from the upcoming window and then Set-Up or Activate Online Backup.
5. Now, select your company file and select the Continue option.
6. Mark the checkbox next to the Backup Local Selected Documents and click Continue to generate the backup file.

Also Read: Inclearing Check in QuickBooks

To Sum Up!!

Here, we wind up this entire post and hope the solutions listed above will help you resolve QuickBooks Migration Failed Unexpectedly error. However, if you cannot resolve the issue even after implementing the resolution steps, then communicate with our experts. To get all answers to your queries, you must reach them out via email or live chat facility.

Pro Tips on How to Upgrade QuickBooks 2019 to 2022 Edition

With the advancement of technology and user requirements, Intuit has released several upgrades and patches to enhance your accounting experience. If you might have witnessed that you are encountering issues while using the current version of QB, then you must upgrade it to the newly released version.

For instance, if you are presently using QuickBooks 2019 it will be discontinued after May 31, 2022. In that scenario, the users need to upgrade QuickBooks 2019 to 2022. You must read this post thoroughly if you are searching for the proper instructions for QuickBooks Desktop 2022 Upgrade.

Are you looking for immediate help to upgrade QuickBooks 2019 to 2022? Give us a call @ +1 855 706 0905 and get your issue fixed within no time. 

Also Read: Sage 50 2021 Download

What are the Benefits of Upgrading QuickBooks 2019 to 2022?

QuickBooks launches several updates and the latest security patches so that you can get access to top-notch accounting features. However, users can take multiple other benefits by upgrading QuickBooks 2019 to 2022. To get you aware of all such advantages of upgrading the software, go through the points listed below thoroughly.

1. To receive the money, you can schedule your bill payments within QBDT via debit cards and credit cards.
2. The best part about upgrading QuickBooks 2019 to the 2022 version is that it provides an unlimited customer service facility. Also, you can get a data recovery facility without charging any additional cost.
3. You can easily obtain the time payments without giving your clients and customers the payment link.
4. Moreover, you may also receive cash instantly whenever the client pays you without any further delays.
5. It also provides you with an option using which you can upload documents to transmit directly via the QuickBooks Desktop mobile application.
6. By upgrading QuickBooks 2019 to 2022, the bill approval process has become much easier to manage the cash flow statement.
7. You can also access the latest options for ease of landed cost calculation and collapsible tabs.
8. Moreover, you can also get an insight into the real-time visibility of the cash flow statement.

Also Read: ABS PDF Install

Minimum System Requirements to Upgrade QuickBooks 2019 to 2022 Edition

Before upgrading the QuickBooks Desktop, ensure that your system must fulfill the minimum system requirements. This will enable you to run the application seamlessly on your device. Below we have specified the system specifications, have a glimpse at it:

  • Operating Systems:-You must ensure that your system must work on the following Windows operating systems, which are as follows:
  1. Windows 11, Windows 10, and Windows 8.1 have 64-bit storage space.
  2. Windows Server 2019, 2016 of the Standard and Essentials Editions.
  3. Windows Server 2012 R2 for the Standard and Essentials Editions.
  • Internet Connection:- It also requires a stable and high-speed internet connection to run the QuickBooks Desktop 2022 smoothly on your system. Also, ensure that you are using the most updated Internet Explorer version i.e, 11 with 32 bits of storage space.
  • RAM:- Verify that your Windows system must have a minimum of 8GB of RAM. Despite this, a minimum of 16 GB RAM must be available on your system to run the software smoothly. Also, verify that up to 8 GB RAM is available for 1-5 users, 12 GB for 10 users, 16 GB for 15 users, and 20 + GB for 20 Users.
  • Hard Disk Space:- The hard disk space to run the application seamlessly must be 2.5 GB.
  • Screen Resolution:- The screen specification must be 1280 X 1024 or higher than up to 2 extended monitors.
  • Antivirus Software:- It works perfectly with antivirus software such as Mcafee, Avast, Bitdefender, Webroot, Avira, Kaspersky, etc.

Also Read: QuickBooks Error H202

How to Create a Backup of Your QuickBooks Desktop Company file?

Before you head towards the upgrade process of QuickBooks Desktop, it is necessary to generate a backup of your company file. This will help you create a duplicate copy of your data file. This is so that you can use the backup file in case of data loss or damage. To generate the backup of the QBDT company file, go through the stepwise instructions listed below.

1. In the initial stage, open QuickBooks 2019 on your system.
2. Soon after this, move to the File menu present at the upper left corner of the tab.
3. Now, you have to explore the Backup Company using the cursor.
4. Thereafter, while entering into the Backup Company tab, choose the Create Local Backup option.
5. As a result, it will automatically generate the backup of the company file of QuickBooks 2019. Thus, now you can easily upgrade the data file without worrying about data loss or damage.

Also Read: Change TurboTax Password

Simple Procedure for Upgrading QuickBooks 2019 To 2022

Are you fed up with searching for the proper steps to upgrade QuickBooks 2019 to 2022? If yes, perform the steps below for the successful upgradation of the QuickBooks software.

1. Begin the process by installing the newly launched version of QuickBooks with the proper admin user rights.
2. Afterwards, create your company file, and then upgrade the data file for every company file that needs to be upgraded.
3. Soon after this, you need to open the QuickBooks version that you want to upgrade to the higher version available.
4. Now, press the F2 key on your keyboard to bring the Product Information Window on your computer screen. Look for your company file within the File Information section.
5. Next,  have to upgrade your company file and also verify you have successfully signed out from the company file.
6. Open the QBDT on your system and move to the Open/Restore company, followed by the Open a Company File option.
7. Make sure you have signed into your QuickBooks company file with the proper admin rights.
8. Further, opt for the Update Now option, which will begin the upgrade process.
9. Following this, tap on the Done option and then opt for the Update QuickBooks option.

How can I Migrate 2019 QuickBooks data to 2022 QuickBooks Desktop?

Once you have upgraded the QuickBooks 2019 to 2022 edition, you can easily migrate the data to the new edition available. To do so, you can either choose the export method or use the IIF files to export or import transactions in QBDT.
1. To begin the process, select the File button located at the top menu option.
2. Soon after this, move to the utility tab and then click on the Export option.
3. Once you have completed importing data to the newly launched version in QuickBooks i.e, 2022.

Also Read: How to Create a New Management Report in QuickBooks

Closure

The QuickBooks 2019 Edition will be discontinued soon, so it is the right time to upgrade QuickBooks 2019 to 2022 Edition. We hope the above-listed instructions will help you upgrade the QBDT application to the newly launched version. However, if you want additional information regarding the updates, contact our experts. Use a live chat or email facility to reach out to our QuickBooks professionals and clear your doubts instantly.